REVIEW · GILI TRAWANGAN
Rinjani Trekking 2D1N Senaru crater rim
Book on Viator →Operated by Senaru Adventures · Bookable on Viator
Rinjani’s Senaru rim hits fast. This 2D1N hike takes you from Senaru village (around 601m) up to the rim at 2,641m, with a guided route through tropical forest and proper breaks along the way. I love camping right on the crater edge and watching the sky change near sunset, with views that can stretch toward Mount Agung in Bali. One consideration: you’ll be sleeping outdoors and the altitude gain is real, so you’ll want a moderate fitness level and a good weather window.
What makes this trek feel special is the pacing and how much is handled for you. You’re not left to figure out gear, meals, or where to stop for lunch. You’ll register with the local trek center first, then follow a schedule that builds from forest walking to rim time, ending with a sunrise breakfast and a return to Senaru village.
In This Review
- Key Highlights You’ll Actually Care About
- Why Senaru’s Crater Rim Is Worth the Effort
- The Altitude Story: From 601m Senaru to 2,641m Rim
- Day 1 Walk: Registration, Tropical Forest, and the Two Big Breaks
- Night at the Rim: Camping Gear, Toilet Tent, and Sunrise Payoff
- Day 2 Descent: Getting Back to Senaru Without the Stress
- Price and Value: What $285 Per Person Really Covers
- The Senaru Factor: Village Time and Why It Feels More Human
- Who Should Book This Trek (and Who Should Rethink It)
- Should You Book the Rinjani Trekking 2D1N Senaru Crater Rim?
- FAQ
- What is included in the Rinjani 2D1N Senaru crater rim trek?
- Where do you get picked up from and dropped off?
- What time does the trek start?
- How high do you hike during the trek?
- Is this trek suitable for beginners?
- Do I need to bring camping gear?
- What happens if weather is bad?
Key Highlights You’ll Actually Care About
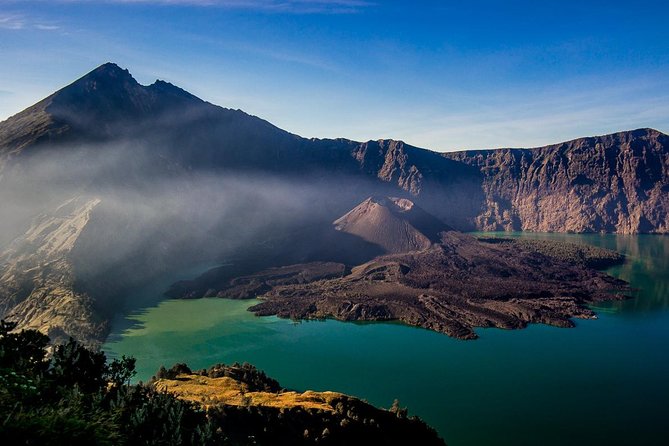
- Camping at the crater rim for sunset and sunrise moments that most Lombok hikes can’t match
- Tea at Post 2 Montong SATAS shelter plus biscuits, a simple break that keeps the climb manageable
- Clear altitude progression: 601m village to 1,500m, then 2,000m, finishing at 2,641m
- All camping gear and kitchen basics included, so you can pack lighter
- Local guides and porters who keep the trek organized and friendly—one name that shows up often is Yantoo
- A full Senaru stay before the trek, letting you get a feel for village life (desa adat Senaru)
Why Senaru’s Crater Rim Is Worth the Effort
If you’re coming to Lombok for the mountains, you usually have two choices: push hard for something longer, or do a focused hike that still gets you to the dramatic part. This Senaru crater rim version is the second option, and it works because it targets the view. You’re not walking all day just to reach a viewpoint miles away. You climb, you camp, and you’re there when the light turns soft.
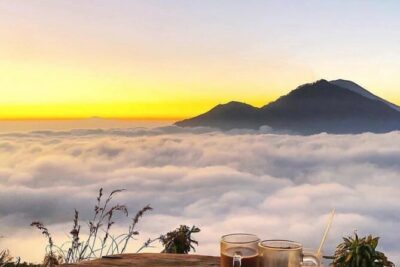
I like that the “big moment” is built into the schedule. The plan puts you at the rim for sunset, when the air often feels crisp and the whole area looks more layered. The itinerary also calls out a view toward Mount Agung in Bali and smoke on the far side, which adds that extra volcanic drama you came for. It’s not only scenery either. Camping on the rim makes you slow down. You stop thinking about checklists and start paying attention to the wind, the dark sky, and how the crater looks from different angles.
The other nice piece: your hike doesn’t ignore comfort. You get real meals and a tent setup, so “camping at 2,641m” doesn’t automatically mean “roughing it.” Still, remember it’s outdoors. If you’re expecting a hotel bed and indoor warmth, this is not that.
The Altitude Story: From 601m Senaru to 2,641m Rim
Start altitude matters here. You begin in Senaru village at about 601m, then climb to the rim at 2,641m. That’s a big jump over a short timeframe, and the route is designed to pace you with breaks instead of sprinting upward.
You’ll get staged stops:
- Post 2 Montong SATAS shelter (1,500m) for tea and biscuits
- Pos 3 Mondokan Lolak (2,000m) for a break and lunch
- Then a steady push to the rim for the final viewpoint time
What this means for you: if you’re a beginner, you’re less likely to feel lost. You can focus on foot placement, breathing, and enjoying the hike instead of guessing how far “one more hour” will be. Porters also help with the logistics, and the guide keeps the pace realistic.
What it doesn’t mean: altitude is still altitude. Even if the route includes breaks, you’ll feel the climb. Pack for wind and cool air at night, and take the slow approach seriously. A calmer pace now helps you enjoy the sunset and sunrise rather than just surviving to them.
Day 1 Walk: Registration, Tropical Forest, and the Two Big Breaks
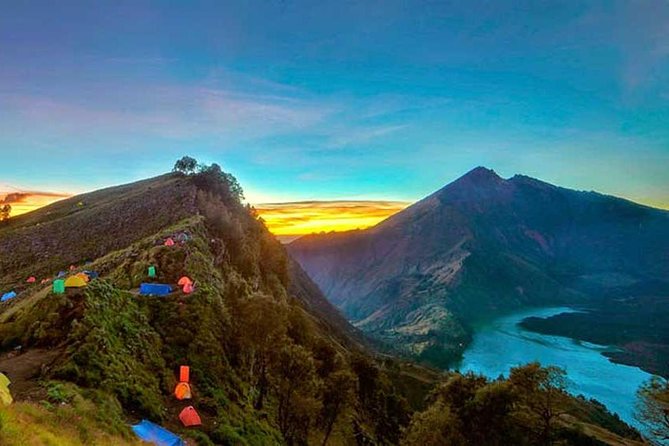
Day 1 starts with a clear rhythm. After pickup and your one-night Senaru base, you’ll walk to the Rinjani Trek Center Senaru to register. Then the trek begins around 08:00 (meeting point is 7:00am), so you’re not rushing out of town at the last second.
Right away, the route begins in dense tropical forest. The details matter because they set the mood for the hike. You’re walking through an area known for flora, bird life, and butterflies, so it never feels like you’re staring at rock for hours before anything happens. It’s the kind of start where you can slow down and actually notice the trail.
Then comes the first meaningful break:
- Post 2 Montong SATAS shelter (1,500m)
You stop for a cup of tea with biscuits. This isn’t just food. It’s a psychological reset. When you’ve climbed enough to work up a thirst and steady effort, that small stop helps your legs recover before the next climb segment.
After that, you continue upward about two hours to:
- Pos 3 Mondokan Lolak (2,000m) for a break and lunch
After lunch, the day shifts. You leave Pos 3 and climb toward the rim at 2,641m, with roughly another two hours to reach the top viewpoint area. The hike calls out that Senaru’s crater has the most spectacular view after the peak. Translation: the final approach is worth it, but the view experience peaks when you arrive and settle.
Sunset time is where Day 1 becomes memorable. You’re camped at the rim, and the plan specifically notes an incredible sunset over Mount Agung in Bali, plus smoke from volcanic activity near the lake area. You get to watch it unfold rather than arriving after it’s done.
Night at the Rim: Camping Gear, Toilet Tent, and Sunrise Payoff
This trek includes the stuff that makes mountain camping realistic. You’ll have a tent, sleeping bag, sleeping mat, plus a toilet tent and the cooking gear needed for meals. That doesn’t eliminate cold or discomfort, but it removes the “I forgot something” chaos that ruins good hikes.
What I like about this approach is that it keeps the experience focused on the mountain. When your setup is handled, you spend your energy on the human side of the day: chatting with your guide, enjoying the crater view in silence, and planning your gear for the morning.
At night, expect the rim to feel more exposed. Even on clear days, higher elevations can turn breezy. Wear layers you can adjust easily. Keep your warm items accessible because once you’re tucked in, you don’t want to rummage around.
Day 2 starts with breakfast with a beautiful sunrise, and that’s the payoff for all the earlier effort. You’re not just climbing uphill to say you did it. You’re climbing to earn the light changes. Sunrise at altitude also tends to feel sharper than sunrise down low, and the crater rim view gives you a full horizon rather than a small lookout angle.
And yes, people really enjoy the way the group dynamic feels on these treks. You get enough time together to build a friendly vibe, but you still have quiet moments when you’re just watching the world shift.
Day 2 Descent: Getting Back to Senaru Without the Stress
Day 2 is structured and simple. After the sunrise breakfast, you leave the crater rim and descend back to Senaru village. The goal is a smooth return that lets you land safely and comfortably.
The descent is where your legs will either feel strong or start complaining. Don’t ignore that. Take your time and let your feet do the work. Going downhill can be tougher than the uphill part for some hikers because of knee strain, even when the distance is shorter.
Once you arrive in Senaru, a car transport takes you onward to your next destination. That matters more than it sounds. Many trekking options leave you stranded at the wrong time or with unclear connections. Here, the plan explicitly includes vehicle return from Senaru after the trek.
So your “experience arc” is complete:
- Day 1: forest climb → breaks → rim sunset → camp
- Day 2: sunrise → crater rim descent → car back to Senaru
It’s the kind of timeline that works if you don’t want to turn your entire vacation into a training program.
Price and Value: What $285 Per Person Really Covers
At $285 per person, the price can look high until you map it against what you’re actually getting. This is not just a guide and a walk.
Included items cover major costs you’d otherwise pay separately:
- Mountain guide and local porters
- All camping equipment (tent, sleeping bag, sleeping mat, toilet tent, cooking gear)
- All meals (three meals daily during the trek)
- One night accommodation in Senaru before the hike starts
- Transport pickup and return from places like the airport, Mataram, Senggigi, Bangsal, or other Lombok locations
- Entrance ticket to Mount Rinjani (150,000 IDR per person)
That combo is the value engine. You’re paying for logistics as much as walking. If you tried to do this independently, you’d quickly spend money on permits, guide time, porters, and equipment—and you might still struggle to coordinate the “how do we handle camping” details.
One note on spending: personal expenses and tipping for guide and porters aren’t included. That’s normal for Indonesia trekking, so it’s smart to budget for it rather than hope it’s optional.
Also keep in mind weather. The trek requires good weather. If it gets canceled due to poor conditions, the plan offers an alternative date or a full refund.
The Senaru Factor: Village Time and Why It Feels More Human
This isn’t only a mountain day. The program includes one night accommodation in Senaru before the trek, and that matters because it puts you into the local rhythm.
Senaru is also known for village culture. You might get the chance to experience desa adat Senaru life through your homestay stay. People commonly talk about warm welcomes and feeling like locals actually notice you rather than just check you in and hand you a key.
In at least one experience, guests have enjoyed homestay-style accommodation around Bukit Senaru, including being welcomed with a drink and friendly hosts. Even if your exact stay differs, the point is the same: you start the trek as a visitor in a community, not as a person who arrived minutes before walking into the hills.
If you like travel that balances physical effort with cultural contact, this format is a good match. You’ll come away with more than a view photo. You’ll remember how the people treated you before the climb.
Who Should Book This Trek (and Who Should Rethink It)
This trek is described as suitable for beginner hikers and people who want the views from the Senaru crater rim. That fits a lot of first-timers because the route includes scheduled breaks and a guide-led pace.
You should book if:
- you want a short but high-reward hike (2D1N)
- you’re okay with camping and cooler mountain nights
- you can handle a steep day with breaks at set posts
- you want the guide and porters handling the heavy gear side
You might rethink it if:
- you’re sensitive to altitude changes and steep walking
- you hate sleeping outdoors, even with a provided sleeping bag and mat
- you want a super relaxed pace all day (this is not that)
If you’re traveling with friends or as a couple, the experience being private for your group is a nice perk. It keeps schedules and vibe consistent.
One small practical tip: start the climb well-hydrated and don’t treat the first hour like you’re warming up for a sprint. Save energy so you can enjoy rim time instead of just watching the sunset through fatigue.
Should You Book the Rinjani Trekking 2D1N Senaru Crater Rim?
I’d book this if you want a focused Rinjani experience with clear pacing, real crater rim time, and logistics that don’t eat your day. The best reason is simple: it gets you to the moment—sunset and sunrise at the rim—without requiring you to become a mountaineer.
It’s also a strong value when you consider what’s included: camping gear, three meals a day, a Senaru base night, transport pickup/return, and the entrance ticket. For many hikers, that’s the difference between “this looks interesting” and “I can actually do it.”
Choose it with eyes open about camping and altitude. If you respect the climb and come prepared for cooler nights, you’ll get a very memorable two days.
If you want to ask yourself one question before paying: are you excited by crater rim sunrise and sunset more than by long hours of walking? If yes, this trek fits.
FAQ
What is included in the Rinjani 2D1N Senaru crater rim trek?
It includes a mountain guide and local porters, all camping equipment (tent, sleeping bags, sleeping mats, toilet tent, and cooking gear), all meals during the trip (three times daily), one night accommodation in Senaru before the trek, pickup and return transport from Lombok locations, and the Mount Rinjani entrance ticket.
Where do you get picked up from and dropped off?
You can be picked up and returned from the airport of Lombok or other locations in Lombok, including Mataram, Senggigi, and Bangsal.
What time does the trek start?
The meeting point start time is listed as 7:00am, and the trekking start is around 08:00.
How high do you hike during the trek?
You start at Senaru village at about 601m above sea level and trek up to the Senaru crater rim at about 2,641m. You also pass stops around 1,500m and 2,000m.
Is this trek suitable for beginners?
Yes. It’s described as suitable for beginner hikers, with a recommendation for moderate physical fitness.
Do I need to bring camping gear?
No. The tour includes camping equipment like the tent, sleeping bag, sleeping mat, toilet tent, and cooking gear.
What happens if weather is bad?
The trek requires good weather. If it’s canceled due to poor weather, you’ll be offered a different date or a full refund.