REVIEW · KILIMANJARO
6 Days Machame Route Kilimanjaro Trekking
Book on Viator →Operated by Mafie Adventures · Bookable on Viator
Kilimanjaro moves fast once you’re on the trail. This 6-day Machame Route is a classic for a reason: you hike through changing habitats and get big views along the way. Two things I really like about this plan are how varied the terrain is and how much is handled for you, from camping gear to porters and meals. The one drawback to plan for is the hard push on summit night, where the pace and mental strain are no joke.
Another plus is the way the Machame route sets you up for acclimatization without dragging the trip out forever. In the feedback tied to this operator, names like Erastus (coordination) and guides such as Matthew, Oliver, and Benjamin come up, along with summit support from people like Joshua. Your consideration: if you hike slowly, the 6 days can feel tight, and a 7-day version is often the comfort choice.
In This Review
- Key highlights before you lace up
- Why the Machame route is such a popular choice on Kilimanjaro
- Price and logistics: what $1,930.42 covers (and what it doesn’t)
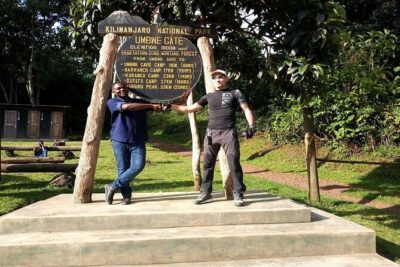
- Getting to Kilimanjaro National Park: the start that shapes your first day
- Day 1: Rain forest trail up to Machame Camp (5,400–9,400 ft)
- Day 2: Moorland ascent to Shira (9,400–12,500 ft)
- Day 3: Shira Plateau to Lava Tower, Arrow Glacier area, and Barranco Hut (12,500–13,000 ft)
- Day 4: Barranco Wall to Barafu Hut and South Circuit views (13,000–15,000 ft)
- Day 5: Midnight summit climb to Stella Point (Arctic terrain)
- Day 6: Rain forest descent to Mweka Park Gate and summit certificates
- Guides, porters, and food: the real comfort system on Kilimanjaro
- Gear and packing advice that matches this route
- Who should choose this 6-day Machame trek
- Should you book this Machame 6-day trek with Mafie Adventures?
- FAQ
- How long is the Kilimanjaro Machame trek in this package?
- Where does the trek start and end?
- Is pickup included?
- What time does the trek start?
- What’s included in the price?
- What’s not included?
- Do I need a sleeping bag or climbing gear?
- Is this a group trek or private?
- What is the cancellation policy?
Key highlights before you lace up
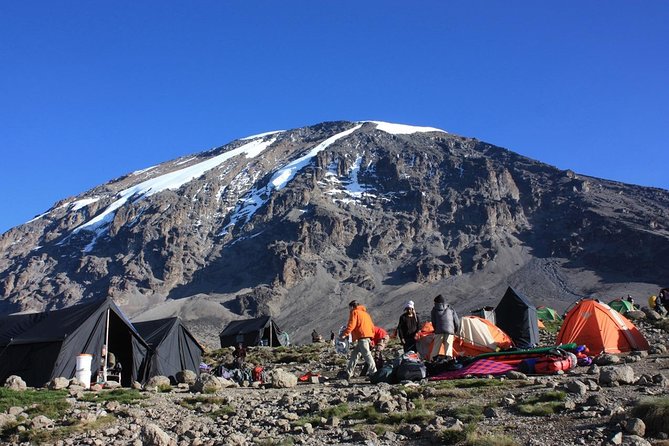
- Rain forest to moorland to semi-desert to alpine desert to Arctic terrain on one route
- Stella Point is the big sunrise moment (weather permitting), reached after a midnight-to-early-morning climb
- Included porters + camping setup means you carry less and sleep in proper camp rather than DIY
- Strong guide team is a repeated theme, with English communication and pace that fits you
- Day-by-day acclimatization strategy even when the elevation looks similar at the end of a day
- You finish at Mweka Park Gate and get summit certificates after the descent
Why the Machame route is such a popular choice on Kilimanjaro
The Machame Route is often picked because it delivers both scenery and variety. You’re not stuck in one “type” of walking. You’ll move from rain forest at the start to moorland, then to harsher zones like semi-desert and alpine desert, before summit-night terrain turns into something closer to Arctic conditions.
Another reason it’s popular is that it’s widely considered a practical balance. It’s chosen by many climbers and can be cheaper than longer itineraries. Translation: you still get the classic Kilimanjaro experience, but you’re not spending extra days paying for more nights on the mountain.
One more thing I like about it: the route naturally mixes steady climbing with strategic “relief” days. That matters on Kilimanjaro, where altitude is the real boss, not your sneakers.
Price and logistics: what $1,930.42 covers (and what it doesn’t)
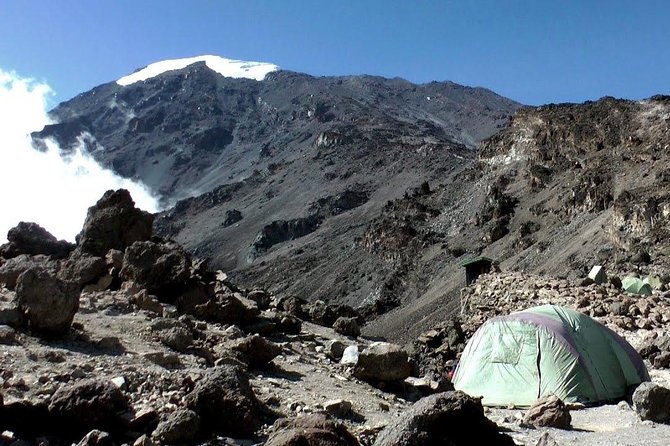
At $1,930.42 per person for about 6 days, this trip isn’t just a ticket to walk uphill. It’s built around the big-cost mountain basics: camping, food, and staff.
Here’s what’s included in the price:
- Camping equipment (mess tent, mattress, and cooking equipment)
- Accommodation while trekking
- Parking fees and rescue fees
- Professional driver/guide and porterage
- Meals: breakfast (5), lunch (5), dinner (5)
- All taxes/VAT
What’s not included:
- Climbing gear rental
- Sleeping bag rental
- International flights
- Accommodation before/after the trek
- Bath towels and personal items (souvenirs, travel insurance, etc.)
- Visa fees (if applicable)
- Any government-imposed increase in taxes or park fees
- Tips
My practical take on value: this price is easier to swallow than it looks because you’re not paying separately for porters, camp setup, and the day-to-day meals. Your extra costs are mostly the items that only matter once you’re close to summit mode: sleeping bag rental and climbing gear rental, plus tips and your flights.
Also, note the operating style: it’s a private tour/activity, so it’s only your group on the mountain. That’s often worth something if you want a guided pace without getting shuffled into a larger herd.
Getting to Kilimanjaro National Park: the start that shapes your first day
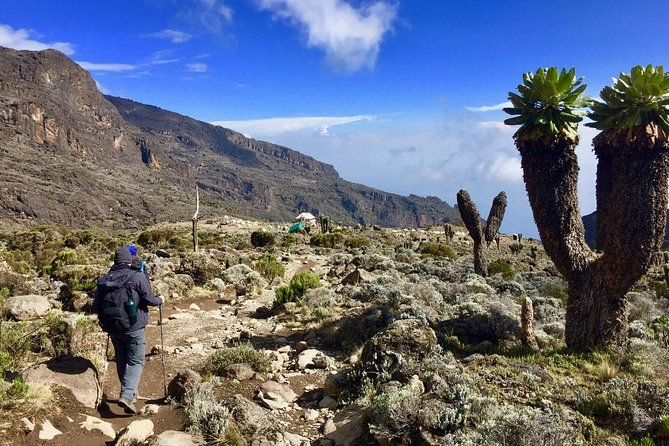
The meeting point is Kilimanjaro International Airport area (and the activity ends back at the meeting point). Pickup is offered, and you’ll also get a mobile ticket.
On day one, there’s a short transfer period: the drive from Moshi to the Park Gate takes about 50 minutes, passing through Machame village on the lower slopes. That’s not just scenery. It helps you transition from city life into mountain life without starting your hike exhausted.
The start time listed is 12:00 am, and summit night starts in the midnight window too. So even if day one isn’t a literal overnight grind, you should mentally prepare for a trek where mornings arrive early and sleep comes on “mountain schedule.”
Day 1: Rain forest trail up to Machame Camp (5,400–9,400 ft)
Day one is all about getting your legs used to the rhythm. You start at the Kilimanjaro National Park area and walk from roughly 5,400 ft to 9,400 ft over about 11 km, with 5–7 hours of hiking in the rain forest.
This part can be muddy and slippery, especially on the winding trail up a ridge. My advice here is simple: bring gaiters and trekking poles if you have them, because your shoes will take a beating.
You’ll begin lower down with more slippery footing, then keep climbing until you reach Machame Camp. The first day is rarely the hardest altitude-wise, but it’s often the day when you learn how quickly your body expects hydration and snacks. Use it to settle into your plan: steady pace, consistent water, and no hero sprinting.
Day 2: Moorland ascent to Shira (9,400–12,500 ft)
After breakfast, the mood changes. You leave the rain forest glades and climb into moorland territory, moving from about 9,400 ft to 12,500 ft over 5 km and roughly 4–6 hours.
Even though the distance is shorter, don’t treat it like an easy day. The walking includes an ascending path and crossings of a steep rocky ridge covered with heather, plus a shift toward a river gorge.
The benefit of this day: it’s a good altitude step without requiring a summit-night mindset. You end at Shira campsite for rest, dinner, and overnight. It’s the kind of day that helps you start feeling the climb “in your lungs,” before things get more serious.
Day 3: Shira Plateau to Lava Tower, Arrow Glacier area, and Barranco Hut (12,500–13,000 ft)
Day three has the stuff people remember: dramatic terrain and that surreal sense of moving through different worlds.
You begin on the Shira Plateau and hike east up a ridge, passing a junction related to the Kibo route direction. Then your route turns southeast toward the Lava Tower, known as the Shark’s Tooth.
After that landmark, you head toward a second junction and the Arrow Glacier area at around 16,000 ft, then you descend to Barranco Hut at about 13,000 ft. On paper, you end the day at a similar elevation to where you started. In reality, it’s a key acclimatization day because your body experiences higher altitude even if your camp ends lower.
This day is also where you practice mountain patience. Long enough to work you, but structured so you’re not just climbing and climbing until breakdown. Expect about 10 km and 6–8 hours, in semi-desert terrain for much of it.
Day 4: Barranco Wall to Barafu Hut and South Circuit views (13,000–15,000 ft)
Day four is where the route starts feeling more like a Kilimanjaro trek and less like a hike. You climb from Barranco through a steep ridge area, passing the Barranco Wall, then continue up into Karanga Valley for the campsite.
Then it connects with the Mweka Trail junction, and you keep going up to Barafu Hut. Elevations are listed roughly 13,000 ft to 15,000 ft, with about 9 km and 8–10 hours of hiking.
This day is long. It’s also important because you’re finishing the South Circuit, and you get views of Mawenzi and Kibo from camp. Even if you’re tired, the sense of seeing your goal from different angles helps the mental side of the trek.
Practical tip: this is the day to manage your energy carefully. Your sleep tonight and your food intake matter, because the next day is a midnight start and the most physically demanding part of the whole plan.
Day 5: Midnight summit climb to Stella Point (Arctic terrain)
This is the day you don’t casually “power through.” You start very early, typically in the midnight to 2am window, and ascend through heavy scree toward the crater rim area.
The listed elevation range is 15,300 ft to 19,345 ft, then you descend down to about 10,000 ft after. The day is described as challenging and is called out as the most mentally and physically demanding portion.
Distance is short on ascent but big on effort: about 5 km ascent and 12 km descent. Expect 7–8 hours of ascent and 4–6 hours descending, in Arctic habitat conditions.
The route ascends between the Rebmann and Ratzel glaciers, moving northwesterly toward Stella Point at about 18,600 ft. At Stella Point, you stop briefly and, if the weather cooperates, you get one of the most memorable sunrises you’re likely to see on any trip.
This is also where your guide matters. In the feedback tied to this operator, guides like Matthew and Oliver are repeatedly credited for support and communication, and summit teams include people like Joshua or Benjamin. That kind of crew doesn’t remove altitude. It just helps you survive it with the right pacing and calm direction.
Day 6: Rain forest descent to Mweka Park Gate and summit certificates
After breakfast, you continue descending down to the Mweka Park Gate to receive summit certificates. You drop from roughly 10,000 ft to 5,400 ft over about 10 km, with only 3–4 hours of hiking time.
It’s shorter than summit day, but it can still feel tough because legs are tired and higher moisture at lower elevations can turn the trail into something wet and muddy.
Here’s what actually helps: gaiters and trekking poles again. Shorts and t-shirts may be enough at lower altitudes, but keep rain gear and warmer clothing handy because weather can swing fast.
Once you reach the gate, that certificate moment is a clean payoff: you’re not just climbing. You’re finishing.
Guides, porters, and food: the real comfort system on Kilimanjaro
On a trek like this, the mountain punishes poor logistics. That’s why I pay attention to camp setup and staffing, not just the altitude numbers.
This package includes porterage and camp accommodation, plus cooking equipment and a mess tent. That means you’re not dragging camp chores on top of the climb. Your porters are handling a big part of the heavy lifting, and your guide team is managing route flow, safety, and pace.
The feedback also points to the team’s communication quality. Guides mentioned include Matthew, Oliver, and Benjamin, with coordination often tied to Erastus. The practical benefit for you: clearer instructions, better pacing, and fewer surprises when conditions shift.
Food matters too. This trek includes full meals each day, and people note that the food and facilities were up to standard. In plain terms, it means you’re less likely to arrive at the next day under-fueled, which is huge for altitude decisions.
Gear and packing advice that matches this route
You have rentals available for climbing gear and a sleeping bag, which helps if you don’t own winter-style mountain gear already. Still, there are a few non-negotiables based on what the trail can do.
I’d plan around:
- Gaiters: muddy/slippery forest segments are specifically part of the plan
- Trekking poles: useful in slippery lower trails and on descent days
- Rain gear: keep it available even when you’re dreaming about sunrise
- Warm layers: especially around summit night and early morning conditions
- Day flexibility clothes: shorts and t-shirts may work lower down, but you’ll still want warmer items for higher zones
Also, think about what you carry. If your crew is supportive (as people describe with guide help for small bags), keep your system simple: one main pack where porters handle the heavy part, and a small daypack for what you need on the move.
Who should choose this 6-day Machame trek
This trek is listed as something most travelers can participate in, and the pace is typically guided and supportive. The key factor is not just fitness. It’s your comfort with a long, steep day and a midnight start on summit night.
This is a strong fit if:
- You want the Machame route’s variety without extending to 7+ days
- You like guided structure and want porters handling camp setup
- You’re okay with early starts and want the reward of Stella Point sunrise
You might want a 7-day plan instead if:
- You hike slowly or tend to get wiped out on long days
- You know you need more acclimatization time to feel steady
If you’re in the middle, you can still do 6 days. Just don’t ignore what your body tells you in the first two days.
Should you book this Machame 6-day trek with Mafie Adventures?
If your main goal is a classic Kilimanjaro experience that mixes habitats and a memorable Stella Point sunrise moment, this 6-day Machame plan looks like a good match. The value is strongest because camp setup, meals, porters, and rescue fees are handled, not added later.
My caution is the timing and commitment. The summit night starts between midnight and 2am, and the hardest physical work is concentrated there. If you’re not ready for that intensity, you’ll feel it.
Also, check your travel insurance thinking early, because the experience is listed as non-refundable and cannot be changed for any reason. If that would stress you out, consider adjusting your overall trip plan before you pay.
If you want: guided pace support, included meals, proper camping setup, and a route known for great variety, this is a compelling option.
FAQ
How long is the Kilimanjaro Machame trek in this package?
The trek is listed as 6 days (approx.).
Where does the trek start and end?
The activity starts at Kilimanjaro International Airport (Kilimanjaro Airport Rd, Tanzania) and ends back at the same meeting point.
Is pickup included?
Pickup is listed as offered.
What time does the trek start?
The listed start time is 12:00 am.
What’s included in the price?
Included items cover camping equipment, parking fees, rescue fees, accommodation, taxes/VAT, a professional driver/guide, porterage, and meals (breakfast 5 times, lunch 5 times, dinner 5 times).
What’s not included?
Not included are climbing gear (available for rent), international flights, accommodation before and after the tour, a sleeping bag (available for rent), bath towels, personal items, visa fees, government-imposed increases in taxes/park fees, and tips.
Do I need a sleeping bag or climbing gear?
You don’t have to bring them, because a sleeping bag and climbing gear are available for rent, but they are not included in the base price.
Is this a group trek or private?
It’s listed as private, meaning only your group will participate.
What is the cancellation policy?
The experience is listed as non-refundable and cannot be changed for any reason.