REVIEW · PUERTO NATALES
Trekking Base Torres – Torres del Paine trek from Puerto Natales
Book on Viator →Operated by Howlanders · Bookable on Viator
Base Torres is the kind of hike that sets your trip’s mood fast. You start early from Puerto Natales, ride into Torres del Paine (usually via Portería Amarga), then spend the day working your way toward the park’s most famous peaks. It’s a tough outing, but it’s also one of the best “time efficient” ways to chase the iconic viewpoint without committing to a multi-day trek.
I really like two parts of this format: the small group size (max 15) and the guide coverage that helps keep everyone safe and moving. I also like the practical setup—trekking poles are included, plus crampons if conditions call for them, which matters in Patagonia where the ground can go from solid to slick in a hurry.
One thing to consider: this is a long, demanding hike, and weather can change quickly. Some people report being advised to leave the summit area sooner than expected, and the pace can feel intense uphill—so it helps to go in with realistic expectations and a calm plan for the final stretch.
In This Review
- Key highlights worth your attention
- A Full Day to Base Torres: What That 6:30 a.m. Start Really Sets Up
- Getting from Puerto Natales to Portería Amarga: The Drive That Sets Expectations
- Inside Torres del Paine: The Moment the Peaks Start Owning the Day
- The Main Trek Segment: Ascensio Valley, Lenga Forest, and That Long Uphill Feel
- The Glacier Moraine Climb: Steep, Rocky, and Where Poles Earn Their Keep
- Base Torres Payoff: Lunch Break, Photos, and the View Time Question
- The Descent and the Lake Moment Back Toward Puerto Natales
- Guide Ratios and Pace Control: Why Mixed Fitness Works Here
- What’s Included vs. What You Pay Separately
- Value and Fit: When This $99 Base Torres Trek Makes Sense
- Should You Book This Base Torres Trek from Puerto Natales?
- FAQ
- What time do I need to be ready for pickup?
- How long is the Base Torres trek day trip?
- What’s the hike difficulty level?
- Does the tour include trekking poles?
- Do I need to pay for Torres del Paine entrance?
- Is lunch included?
- Do I need a headlamp and gaiters?
- How big is the group, and how many guides are there?
- What should I bring besides good shoes?
Key highlights worth your attention
- Early 6:30 a.m. start makes the day feel full, but it also gives you a shot at better conditions
- Small group (max 15) and guide ratios shift by season for more personal pacing
- Ascensio Valley + Lenga forest make the hike more than just a straight uphill grind
- Glacier moraine climb is steep and rocky, with the views arriving as you earn them
- Time at the Base Torres viewpoint can be short if wind or weather moves in
A Full Day to Base Torres: What That 6:30 a.m. Start Really Sets Up
Your day starts early—pick-up typically lands between 6:30 and 7:00 a.m. After you meet your guide, the group is kitted out with trekking poles, and you’ll get a briefing focused on how the Base Torres portion works.
That early start is not just tradition. It helps you beat the worst of the day’s weather swings and gives you a more reasonable buffer for the hike’s hardest sections. And because you’re on a 10 to 12 hour schedule overall, the day is structured tightly enough that you don’t get lost in logistics.
The tone is: move smart, not just fast. Many people highlight that guides keep the group together even when fitness levels vary.
You can also read our reviews of more tours and experiences in Puerto Natales.
Getting from Puerto Natales to Portería Amarga: The Drive That Sets Expectations
Once you leave Puerto Natales, you’ll take a two-hour shuttle bus ride to the Torres del Paine entrance area, entering through the Portería Amarga sector. From the moment you’re in the park, expect those “oh wow” moments to start early rather than waiting until the hike ends.
This road leg matters more than you might think. It’s part of why a one-day Base Torres trek can work at all. You’re not stitching together transport on your own, and you’re not spending precious morning time figuring out where to line up or what gate you’re using.
Also, the shuttle format supports group consistency: you arrive together, your gear and briefing stay organized, and the pace transitions into hiking without awkward gaps.
Inside Torres del Paine: The Moment the Peaks Start Owning the Day
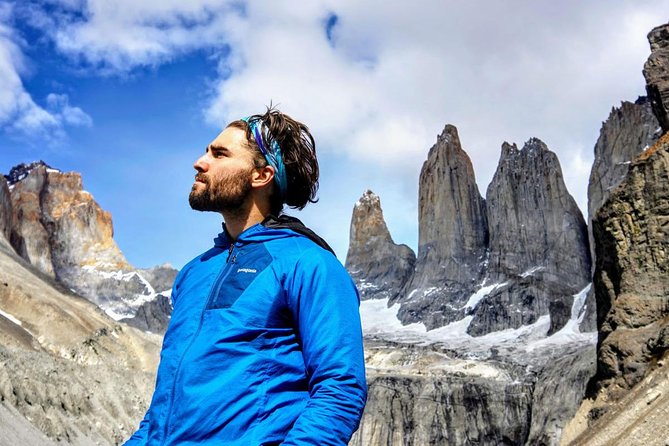
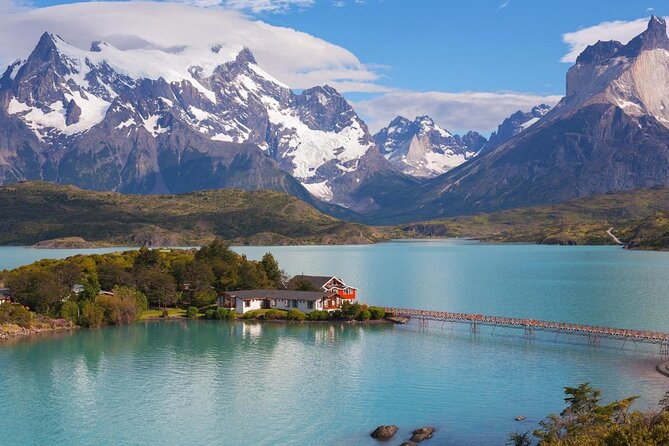
Right after entering Torres del Paine, you’re not just traveling—you’re already looking at the terrain you’ll be hiking toward. The park’s famous peaks are the main reason this trek exists, and you get park views early enough that the day feels like a progressive reveal.
You should also know what is not handled here: the national park entrance fee is not included. So plan on budgeting for it before you go, and don’t assume your $99 covers everything.
When the weather is clear, this is where the hike starts feeling like something you’ll remember forever. When weather is rough, these early views are still valuable because they help you understand the scale of what’s coming next.
The Main Trek Segment: Ascensio Valley, Lenga Forest, and That Long Uphill Feel
The heart of the day is the walk toward Mirador Las Torres (Base Torres viewpoint). The route to get there is about a four-hour stretch in hiking time, and it includes a few distinct environments that make the effort more tolerable.
You’ll cross the Ascensio Valley and then spend time walking through Lenga forest. Those forest hours matter in Patagonia because they can reduce wind exposure and give you something steady to focus on—breathing, foot placement, and rhythm.
Along the way, you’ll also see Almirante Nieto Hill from multiple perspectives, which helps the walk feel less repetitive. It’s one of those details that turns a “go climb a mountain” plan into a real route with changing points of interest.
Here’s the reality check: the trek is described as medium to demanding, but the uphill effort is what most people feel. Reviews consistently frame it as tough, but worth it. If you’re coming from running or gym workouts, you’ll probably find it challenging yet doable. If you’re less used to steep climbs, budget extra time mentally and physically.
The Glacier Moraine Climb: Steep, Rocky, and Where Poles Earn Their Keep
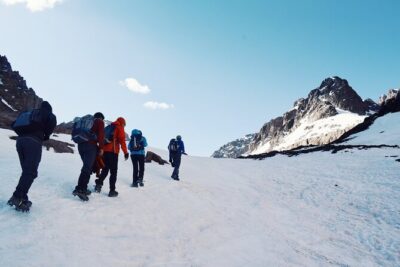
After the forest and valley section, the route includes a glacier moraine climb—a rocky path with a steep slope. This is the part where trekking poles turn from “nice” into “helpful.”
You’re working uphill on uneven ground, and that final push to the viewpoint area can feel relentless. Multiple guides in feedback are praised for safety focus and for making sure nobody gets left behind. That’s especially important on moraine terrain because footing matters more than speed.
There’s also a practical consideration for your energy planning. Some people mention not taking the very last segment (described as step-like scrambling), and instead using an alternative viewpoint. If you think you might need that option, it’s smart to talk to your guide early so you know your choices before fatigue makes decisions harder.
Base Torres Payoff: Lunch Break, Photos, and the View Time Question
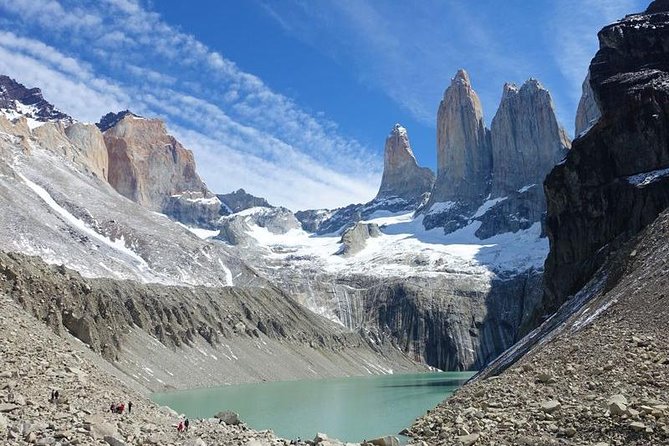
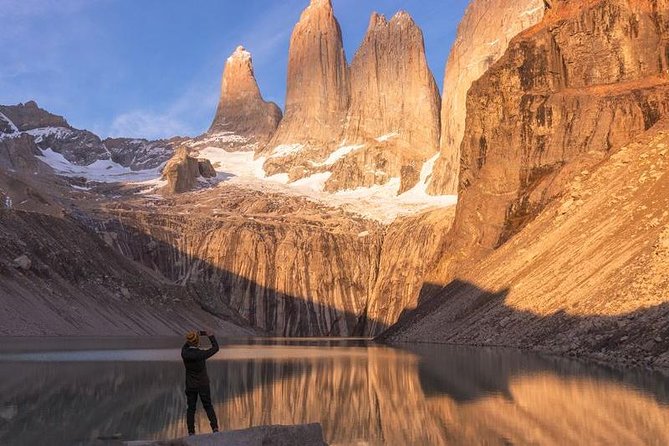
When you finally reach the viewpoint area, the day starts paying you back. This is where the famous peaks live up to the hype: the “Torres del Paine” name isn’t marketing fluff. It’s a real visual anchor.
There’s typically a lunch moment at the top with time for photos and a bit of decompression. However, the tour data lists lunch as not included, so you should bring snacks and water you can trust. If your group is provided a meal on the day, great—just don’t assume it automatically.
One more reality check from feedback: time at the top may be shorter than you hoped if weather changes fast. Some people reported being advised to leave within a tighter window, especially when wind and clouds moved in. Your goal should be to enjoy what you can when you’re up there, rather than banking on a perfect-weather sit-down.
If you get clear conditions, you’ll likely love it. If conditions are rough, you’ll still get the value: reaching the viewpoint area means you understand why this hike is a bucket-list magnet.
The Descent and the Lake Moment Back Toward Puerto Natales
After the viewpoint time, the plan includes a descent that takes roughly three hours. That’s time you’ll feel in your legs, especially if the uphill pace was intense. The good news is that descending is usually easier with a steady cadence rather than sudden power moves—still tough, just different.
You also get a small extra highlight on the way down: the group meets at a small beach formed by the lake, where you can touch the water and take in views from a lower angle. It’s a nice reset after climbing because it brings your brain back out of summit mode.
Then the shuttle bus returns you to Puerto Natales, typically arriving between 8:00 and 9:00 p.m. That late return matters because it tells you how big the day is. You won’t be doing nightlife plans afterward. Plan for a calm evening, good food, and feet that need serious attention.
Guide Ratios and Pace Control: Why Mixed Fitness Works Here
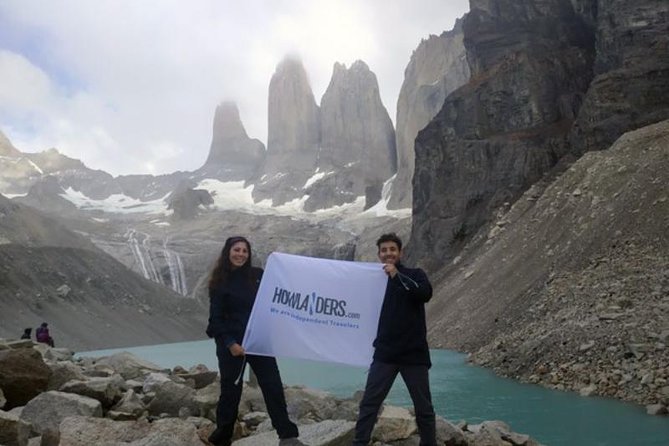
One of the most praised parts of this trek is how it handles mixed abilities. Group sizes are capped (max 15), and guide coverage adjusts by season: in winter, groups are smaller with about one guide per four travelers. In summer, groups can be larger, up to 21, with around one guide per six travelers to match walking pace.
Even within one-day limits, that ratio is why many people report a supportive experience: your guide can slow down for slower hikers, regroup without drama, and keep the group safe during steep or rocky sections.
Names that come up in feedback include guides like Pablo, Matías, Alex, Philippe, Emilia, Sebastián, Leo, Claudia, and Ramiro—often praised for pacing, safety, and local knowledge. Some reviews also mention guides making adjustments during bad weather, including finding alternate routes or choosing not to push to the final summit area if conditions became dangerous.
So if you’re worried about being stuck with a too-fast group, this tour is designed to reduce that risk.
What’s Included vs. What You Pay Separately
Here’s where this trek can feel like real value.
Included:
- Shuttle bus transportation from the Puerto Natales area
- Bilingual guide and assistant guide (with a ratio designed to stay with the group)
- First aid kit
- Trekking poles
- Crampons if necessary
Not included:
- Torres del Paine National Park entrance fee
- Lunch
- Headlamp and gaiters only mandatory in winter (June to September)
Mandatory for you to bring:
- Mountain shoes with good soles
- Food and drinks
- Headlamp and gaiters during winter season (June to September)
A small but important tip: bring a headlamp even outside winter if you think you might get slowed by conditions. The tour ends late, and Patagonia weather can delay plans. The provided gear list is explicit about headlamps in winter, but your timing risk is real any season.
Value and Fit: When This $99 Base Torres Trek Makes Sense
At $99 per person, the price is attractive for a full-day trek that includes the heavy logistics: transport, guide staffing, and key hiking gear like poles. The main extras you should expect are the park entrance fee and lunch.
This trek is especially good for you if:
- you’re pressed for time and want the Base Torres experience without multi-day planning
- you prefer a structured group day rather than independent transport in and out of the park
- you want a guide who’s focused on pacing and regrouping
It may not be ideal if:
- you’re expecting a relaxed walk or lots of long scenic stops
- you’re very sensitive to uphill pressure and tight schedules at the top
- you need a guaranteed long summit stay regardless of weather (because conditions can change quickly)
Based on the feedback, the most memorable days are the ones where hikers go in prepared for a hard effort and trust the guide’s judgment when weather shifts.
Should You Book This Base Torres Trek from Puerto Natales?
If your goal is a one-day shot at Torres del Paine’s most famous viewpoint, this tour is a strong bet. The small-group structure, guide ratios, and inclusion of trekking poles make it easier to get the hike done safely and on time. Most importantly, the Base Torres viewpoint is not something you can fake—when the weather cooperates, it’s the kind of payoff that sticks.
Book it if you can handle a long, steep day and you’ll pack for uncertainty (good shoes, snacks, water, and the winter gear if you’re traveling June to September). Consider a different plan only if you’re looking for an easy walk, or if you strongly dislike the idea that summit time may be shortened when weather turns.
FAQ
What time do I need to be ready for pickup?
Pickup starts at 6:30 a.m. (often arriving between 6:30 and 7:00 a.m., depending on where you’re staying).
How long is the Base Torres trek day trip?
Plan for about 10 to 12 hours total.
What’s the hike difficulty level?
It’s listed as medium for fitness level, but the trek is described in practice as long and demanding, with steep and rocky uphill sections.
Does the tour include trekking poles?
Yes. Trekking poles (Black Diamond or similar) are included.
Do I need to pay for Torres del Paine entrance?
Yes. The park entrance fee is not included.
Is lunch included?
No. Lunch is not included.
Do I need a headlamp and gaiters?
You only must bring a headlamp and gaiters during the winter season (June to September, approximately).
How big is the group, and how many guides are there?
The tour has a maximum of 15 travelers. Guide ratios vary by season: 1 guide per 4 travelers in winter and 1 guide per 6 travelers in summer, with a bilingual guide and an assistant guide.
What should I bring besides good shoes?
Bring food and drinks. If you’re hiking in June to September, also bring a headlamp and gaiters.