REVIEW · ARUSHA
7 Days Kilimanjaro Trekking Machame Route with Professional Guide
Book on Viator →Operated by Africa Joy Tours - Day Tours / Mult Day Tours · Bookable on Viator
Torchlight is the opening scene on Kilimanjaro. This 7-day Machame route (also called the Whiskey route) runs from Machame Gate through rainforest, up to the Shira Plateau, across toward the Southern Icefield views, and then up from Barafu Hut for a sunrise push toward the crater rim, with a professional guide and included oxygen for safety.
I love how the route is designed for your body, with an extra acclimatization day and shorter daily hikes compared to some faster plans. I also love the calm, grown-up logistics: private transfers into Arusha, a pre-climb briefing around 4:30 pm, and an equipment check before you ever hit the trail. Private transfers keep you from wasting energy on logistics chaos.
One thing to plan for: the summit day is serious. You start by torchlight around 1 a.m. and you’re looking at a long, cold, loose-scree climb—so this needs a steady pace and real stamina, not just enthusiasm.
In This Review
- Key highlights you’ll notice fast
- Why the Machame Whiskey Route Works for Acclimatization
- Arusha Arrival Day: Private Transfer, Briefing, and Equipment Check
- Days 2–3: Machame Rainforest to Shira Plateau (12,600 ft views)
- Days 4–5: Barranco Camp, Karanga, and Southern Icefield Vantage
- Day 6: Barafu Hut Rest Day Plus an Acclimatization Hike (15,700 ft)
- Day 7: 1 a.m. Torchlight Ascent to Stella Point, Then Uhuru Peak If You’re Ready
- Day 8–9: Forest Descent to Mweka Gate, Coffee Farms, and Arusha Return
- Guides, Porters, and Safety Stuff That Actually Matters on Kilimanjaro
- Price and Inclusions: Is $2,400 Good Value for This Route?
- Packing and Pace Tips to Match the Actual Trek Rhythm
- Who This Trek Fits Best (and who should think twice)
- Should You Book This Machame 7-Day Kilimanjaro Trek?
- FAQ
- FAQ
- What is the start time for the trek?
- How long is the overall trip, and how many days are on the mountain?
- Where does the trek start, and are airport transfers included?
- What meals are included during the trek?
- What safety equipment and support are included?
- Do I need to have medical coverage and travel insurance?
- What is the summit schedule like on the main summit day?
- Are tips included in the price?
- What happens if the trek is canceled due to weather?
Key highlights you’ll notice fast
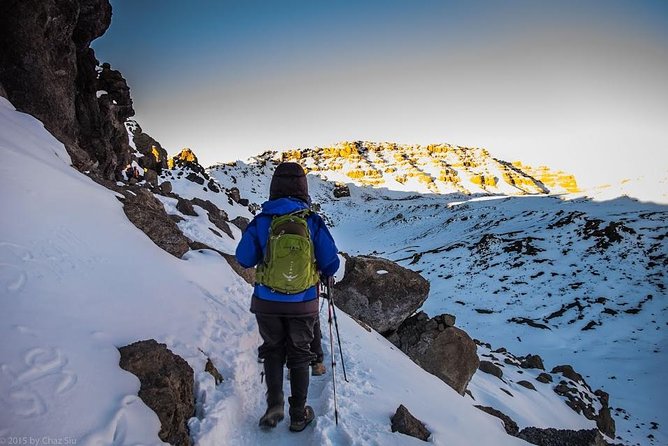
- Machame route with built-in acclimatization (extra day on the mountain, shorter hiking blocks)
- Oxygen and rescue fees included, plus first-aid support and tents
- A sunrise summit strategy: Stella Point first, then Uhuru Peak if you feel strong
- Professional guide teams with a track record of pacing you based on how you’re feeling (names that have appeared include Frankie, Nestor, Emmanuel, Bryson, Augustine, and Clinton)
- Day-by-day scenery shifts from rainforest to moorland to volcanic scree, without feeling like you’re rushing
Why the Machame Whiskey Route Works for Acclimatization
Kilimanjaro isn’t a “hard hike” in the normal sense. It’s more like a long test of altitude tolerance—meaning how fast you gain, how you rest, and how steady your pace is matter as much as fitness.
That’s where the Machame 7-day plan earns its keep. Machame (the Whiskey route) climbs from the lush southern rainforest up toward the Shira Plateau, then it keeps you moving in ways that help you acclimatize. The big win here is that it includes an additional acclimatization day, and many days on the mountain are shorter than in more aggressive itineraries. Practically, that means fewer ultra-long slogs, and more time for rest, hydration, and slow walking—the stuff that helps your body handle the thin air.
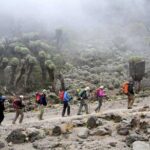
You’ll also see a classic Kilimanjaro progression. You start in dense forest, then you transition into moorland with giant heather, and later the trail turns volcanic and gritty with scree. That variety is more than scenery candy. It changes how your legs feel: forest walking tends to be softer and steady, while scree days demand controlled footing and slower pacing. If your guide is good at reading your breathing, this route gives them time to adjust you before problems snowball.
You can also read our reviews of more tours and experiences in Arusha.
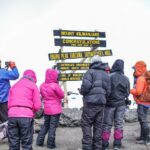
Arusha Arrival Day: Private Transfer, Briefing, and Equipment Check
Your trek starts in Arusha, after you land at Kilimanjaro International Airport (JRO). You’ll get a private transfer from the airport to Arusha Safari Lodge. Evening is for getting organized, not for heroics.
There’s a pre-climb briefing around 4:30 pm, plus an equipment check before dinner (served at 6:30 pm). This part matters more than people think. Kilimanjaro trips succeed or fail based on small details: layering strategy, hydration habits, footwear you can trust, and knowing what you’ll need in the cold. Having that confirmed before you sleep helps you start the next day with less guesswork.
You also confirm your mandatory medical coverage and travel insurance during that briefing. That’s a signal you should treat this climb like a real high-altitude activity, not a casual nature walk. And yes, it’s normal to feel a little nervous. That’s part of the process.
Days 2–3: Machame Rainforest to Shira Plateau (12,600 ft views)
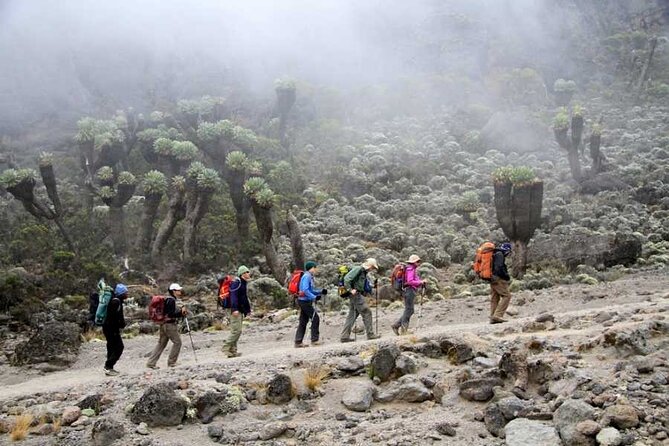
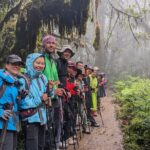
Day 2 begins at Machame National Park gate and then heads into the rainforest. The trail is lush and wet, and you’ll be walking through greenery with a real sense that you’ve left “street-level” life behind. You’ll have a picnic lunch on the way, and then you camp at Machame Camp at about 9,800 ft.
Walking time is typically around 5–6 hours. That’s a useful first day because it lets your body wake up without rushing altitude too aggressively. Also, rainforest walking teaches you one important Kilimanjaro skill: keep a steady rhythm even when the air feels heavy and the ground is uneven.
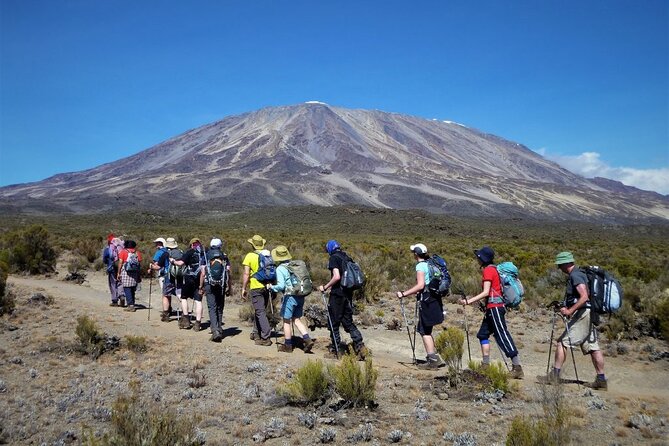
Day 3 is where the world changes. You leave the forest and enter moorland with giant heather. The trail climbs steadily through rocky hills with wide views of the Shira Plateau. You’ll camp near Shira Hut at about 12,600 ft, with a walking time around 4–5 hours.
One nice detail: from camp, you can catch major views of Mt. Meru floating among the clouds. It’s not just a photo stop. Seeing Meru helps you understand the geography—this whole area is alive with vertical weather patterns, and those same patterns will shape what the summit night feels like.
Days 4–5: Barranco Camp, Karanga, and Southern Icefield Vantage
Day 4 pushes you into the Barranco Valley area. After lunch near Lava Tower (around 14,900 ft), the trail descends to Barranco Camp at about 12,800 ft. The walking time here can run 7–9 hours, which is long, but the day includes that key altitude shift: you’re coming down into a camp area with spectacular cliffs and views.
Why that matters: after climbing up, you’re giving your body a chance to recover while still staying active. Rest isn’t just lying down. It’s the way you manage altitude while keeping your muscles moving.
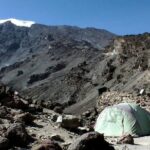
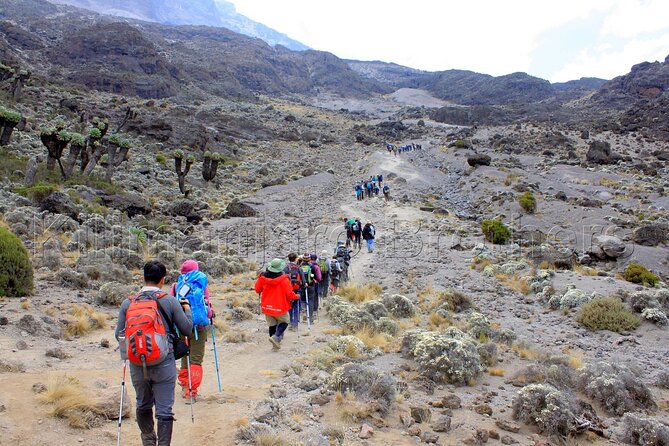
Day 5 brings a steep climb up the Barranco Wall and then continues along the Kibo southeast flank. This is a big viewpoint day. The terrain turns into scree—loose volcanic grit—with pockets of lush vegetation in sheltered areas. You’ll camp at Karanga Camp around 13,100 ft. This day is usually about 5–7 hours walking.
The practical takeaway: scree walking is tiring in a different way. Your calves and core work harder to keep you stable. The right approach is short steps, slow pace, and frequent checks on how you’re breathing. This is also one of the moments where a professional guide’s experience matters most. If you start charging uphill, you’ll pay later. If you keep it controlled, you arrive at camp with enough energy to rest well.
Day 6: Barafu Hut Rest Day Plus an Acclimatization Hike (15,700 ft)
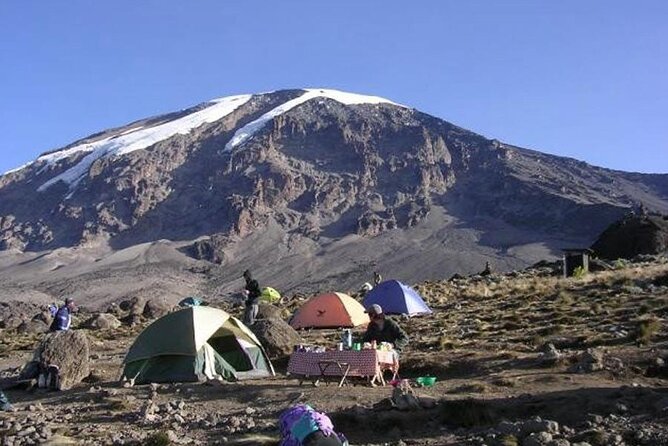
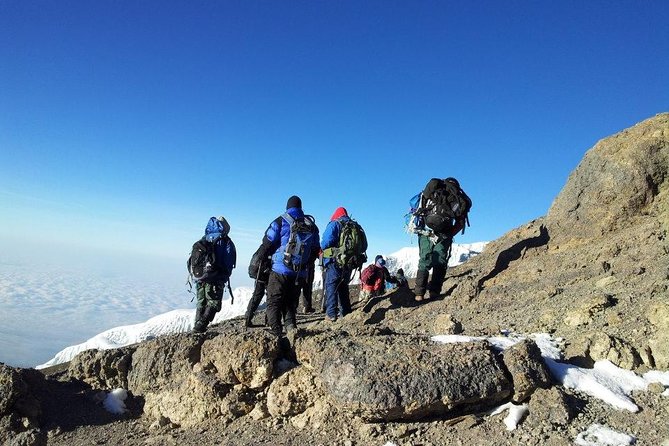
Day 6 is a relief day disguised as a climb. You follow a path on compacted scree with wide views and steadily gain altitude to reach Barafu Hut around 14,800 ft for lunch.
Then there’s a short acclimatization hike to the plateau at about 15,700 ft. It’s not meant to exhaust you. It’s meant to help you acclimatize—again, the theme of this route.
After that, the remainder of the day is for resting and preparation for the early morning summit push. In other words: you’ll walk some, but you’ll spend your energy in the right direction—saving strength for the night climb. If you’re prone to getting impatient, this is the day to slow down mentally as well as physically.
Day 7: 1 a.m. Torchlight Ascent to Stella Point, Then Uhuru Peak If You’re Ready
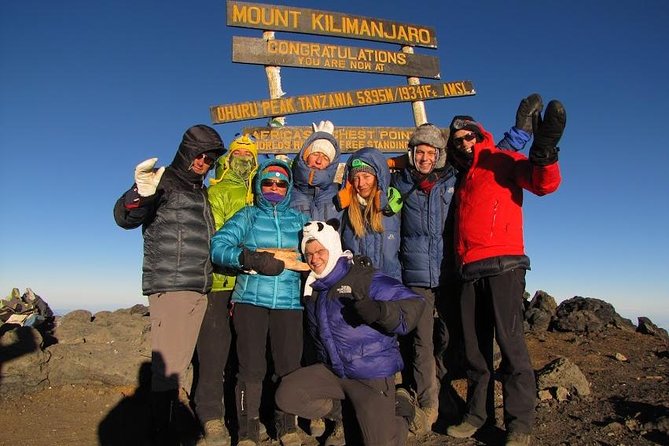
This is the day people remember, because it starts before you think you can start. You begin your ascent by torchlight around 1 a.m., aiming to reach the crater rim by sunrise.
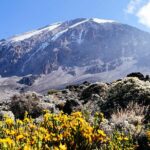
The climb goes over loose volcanic scree with well-graded zig-zags. Expect a slow but steady pace. You’re climbing to Stella Point at about 18,800 ft, typically taking around 5–6 hours.
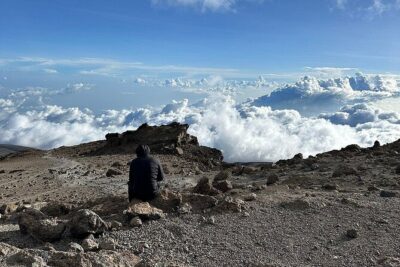
Then you get a short rest on Stella Point to enjoy sunrise with Mawenzi in view. This stop isn’t filler. It helps you reset your body temperature and breath before the decision that matters.
If you still feel strong, there’s the option of a two-hour round trip along the crater rim to Uhuru Peak (around 19,345 ft). The route passes close to glaciers and ice cliffs that still occupy much of the summit area.
From there, descent to Barafu is surprisingly fast. After refreshments, you continue descending to reach Millennium Camp around 12,500 ft. The full day can be long—anywhere from 11 to 15 hours walking depending on how you pace and how long you linger at the viewpoints.
Two real pieces of advice here:
- Keep your pace conservative until your breathing is calm. Slow here beats exhausted later.
- Dress and protect for cold. Torchlight hours are colder than you expect, and the wrong layer strategy is one of the easiest ways to lose comfort and focus.
Day 8–9: Forest Descent to Mweka Gate, Coffee Farms, and Arusha Return
Day 8 is sustained descent through tropical forest alive with birdsong and lush undergrowth. You’ll see a different side of Kilimanjaro—less dramatic altitude drama, more living ecosystem energy.
You wind down to the Kilimanjaro National Park gate at Mweka (about 5,400 ft) and then continue through coffee and banana farms to Mweka village, where you transfer back to your lodging in Arusha.
Walking time is about 4–6 hours. After summit night, this can feel like a relief. Just don’t get overconfident: your legs are still recovering, and downhill can be rough on knees and ankles. Trek poles (if included or available for you) can help a lot.
Day 9 is your farewell day. After saying goodbye to your team, you get a private departure transfer from Arusha to Kilimanjaro International Airport (JRO), unless you add options like a short safari.
Guides, Porters, and Safety Stuff That Actually Matters on Kilimanjaro
The most praised aspect from past experiences connected to this trek is the human support: guides and porters described as professional, kind, and genuinely helpful. Names that have shown up include Frankie and Nestor, plus Emmanuel, Bryson, and Augustine. Another guide name mentioned is Clinton. The consistent theme across these mentions is not just friendliness—it’s smart pacing and attention to how you feel.
That’s huge for Kilimanjaro. Altitude isn’t predictable, and the guide who can sense when you need to slow down can meaningfully change your chances of a comfortable summit attempt.
On top of the people, the safety structure is also part of the value. Included in the package:
- Oxygen
- Rescue fees
- First aid support
- All gears and tents
I like it when a trek package doesn’t leave safety gear as an optional extra you only discover at the last minute. Having oxygen and rescue fees included gives you more confidence that the team is prepared for typical high-altitude problems.
Also, you’ll likely have a support crew. One group described a total of 22 people supporting them with food, tent setup, and carrying personal items. You don’t need to know the exact headcount for planning, but it’s a reminder that this is a staffed operation, not just a guide with a backpack.
Price and Inclusions: Is $2,400 Good Value for This Route?
At $2,400 per person, you’re paying for more than “someone to lead you.” You’re paying for permits and park fees (all fees and taxes are included), private transport and transfers, mountain accommodations, meals across the trek, safety resources, and the climbing logistics that make the experience smooth.
Let’s break down where the money goes, based on what’s included:
- Professional guide and all transfers
- Accommodation (on the mountain and in Arusha)
- Tents and camping setup support
- Oxygen and rescue fees
- First aid
- Meals: 9 breakfasts, 8 lunches, 8 dinners
That list matters because Kilimanjaro adds up quickly if you have to separately source gear, pay for mountain support systems, or handle logistical surprises. Here, the package tries to cover the big cost categories up front.
What’s not included: tips. That’s standard in many trekking situations. I’d plan a budget for tipping your guide and porters because they’re doing real work—carrying loads, managing tents, and watching your pace and comfort day after day.
Also, keep in mind that this is a private tour/activity, so you’re not sharing the experience with strangers. That can be a value multiplier if you want control over pacing and communication.
Packing and Pace Tips to Match the Actual Trek Rhythm
This trek is moderate in fitness requirements, but don’t let that word fool you. Kilimanjaro is still Kilimanjaro. Your goal is to match the rhythm of the route: steady climbs, controlled pacing, and real rest days.
A few practical tips that line up with how this Machame plan runs:
- Start Day 2 and Day 3 easy. You’re building altitude tolerance, not speed records.
- Expect scree days (especially around Karanga and up toward Barafu). Short steps and slow breathing beat willpower.
- On the summit night, plan for cold and fatigue. The torchlight start means you’ll be working in darkness and low temperatures for hours.
- Drink and eat consistently. Hunger and thirst are common at altitude, and they can make you feel worse than you actually are.
- Use your guide’s pacing judgment. If you’re struggling, it’s not a moral failure. It’s the body asking for a slower plan.
And one more thought: pack for comfort first, warmth second, weight last. You’ll appreciate it more on torchlight hours than you will at sea-level.
Who This Trek Fits Best (and who should think twice)
This Machame 7-day trek is a strong match if:
- you want a route with an acclimatization focus (more forgiving than faster plans)
- you prefer a professional team that manages your pace rather than pushing group energy
- you like clear logistics: pickup, transfers, pre-climb briefing, and planned meals
- you’re okay with long walking days, especially around Barranco and the summit push
It may be a rough fit if you:
- can’t manage cold early mornings or long nights
- know you’ll struggle with very steep, loose volcanic terrain
- expect Kilimanjaro to feel like a normal day hike
That said, the trekking experiences associated with this company include groups with a wide range of ages and non-expert hiking backgrounds. The common thread is support, pacing, and organization.
Should You Book This Machame 7-Day Kilimanjaro Trek?
If you’re choosing between Kilimanjaro routes, I’d lean toward booking this one if your priority is a smarter acclimatization rhythm plus serious safety support. The combination of an extra day for adjustment, included oxygen and rescue support, and professional guides who can pace you makes this plan feel grounded rather than risky.
I’d book it too if you want the trip to run smoothly from Arusha through JRO. Private transfers, a pre-climb briefing with medical coverage checks, and all the core gear and camping setup included remove a lot of stress.
One final practical note: this trek requires good weather. If weather cancels the trip, you’ll be offered a different date or a full refund.
FAQ
FAQ
What is the start time for the trek?
The start time is 8:30 am.
How long is the overall trip, and how many days are on the mountain?
The duration is listed as 9 days (approx.), with a total of 7 days on the mountain.
Where does the trek start, and are airport transfers included?
The trip begins and ends at Arusha. There is a private transfer from Kilimanjaro International Airport (JRO) to Arusha on arrival, and a private departure transfer from Arusha to JRO at the end.
What meals are included during the trek?
Breakfast is included for 9 days, lunch is included for 8 days, and dinner is included for 8 days.
What safety equipment and support are included?
The package includes oxygen, rescue fees, first aid, tents, and all gears, along with a professional guide.
Do I need to have medical coverage and travel insurance?
Yes. During the pre-climb briefing, you confirm you have the mandatory medical coverage and travel insurance.
What is the summit schedule like on the main summit day?
You start the ascent by torchlight around 1 a.m., aim to reach the crater rim by sunrise, and climb to Stella Point around 18,800 ft. There is an optional round trip to Uhuru Peak if you feel strong.
Are tips included in the price?
No. Tips are not included.
What happens if the trek is canceled due to weather?
This experience requires good weather. If it’s canceled due to poor weather, you’ll be offered a different date or a full refund.