Kilimanjaro starts with a slow walk, not bravado. This 8-day private Lemosho route from Arusha focuses on gradual altitude gains through shifting climate zones, so you’re not just chasing a summit number. I love how the plan builds time for acclimatization while still keeping the hiking days moving forward with purpose.
What also impressed me is the attention to safety and camp comfort: professional mountain guides (including Gasto, with Joe and Jeff listed as part of guide teams) and campsite setups where your sleeping gear is handled for you. My only caution is the physical reality: the summit push is steep and long, and one of the camps (Kosovo) is on an exposed ridge, so if you’re prone to feeling stressed by cold or heights, plan to take it seriously.
In This Review
- Key highlights I’d plan around
- Why the 8-Day Lemosho Route Works for Altitude Acclimation
- Getting Started: Arusha to the Londorossi Gate
- Day 1–2: Montane Forest to Shira Plateau Views
- Day 3: Shira Plateau Options and Moir Camp in a Gorge
- Day 4: Lava Tower Acclimatization, Arrow Glacier, and Barranco Camp
- Day 5: Barranco Valley and the South Circuit to Karanga Camp
- Day 6: Kosovo Camp, Barafu Views, and Summit Prep
- Day 7: Midnight Start, Stella Point Sunrise, Uhuru Peak
- Day 8: Mweka Gate, Vehicle Transfer, and That Shower
- Guides, Tents, and Food: What the Price Includes (and Why It Matters)
- Toughness Reality Check: Who This Trek Suits
- Should You Book This 8-Day Private Lemosho Trek?
- FAQ
- What is the start time for this trekking experience?
- Where does the 8-day trek begin?
- How long is the trek?
- Is this a private tour?
- What route does the trek follow?
- Are park fees and rescue fees included?
- What camping setup and comfort are included?
- Are meals included?
- What is not included in the price?
- Is pickup or airport transfer included?
Key highlights I’d plan around
- Private small-group feel with your own group doing the trekking schedule together
- Lemosho pacing through forest, savannah, plateau, and the Barranco/Karanga/Kosovo stages
- Acclimatization built in via the Lava Tower day before the steepest leg
- Summit night structure with a midnight start aimed at Stella Point sunrise and Uhuru Peak
- Comfort basics included: four-season waterproof tents, mess tents with table and chairs, and full meals on the mountain
- Team support beyond the trail with administrative coordination handled by Rosemary (not just the mountain work)
Why the 8-Day Lemosho Route Works for Altitude Acclimation
If you’re choosing between Kilimanjaro routes, the Lemosho pitch is simple: you spend more days getting used to thinner air before you go all-in. On an 8-day schedule, that matters because altitude problems are often about timing. Too-fast climbs can turn a dream trip into a miserable slog.
This plan follows the classic Lemosho arc—starting lower on the western side, moving out of the montane forest into open terrain, then crossing the Shira plateau, and finally working through the Barranco and Karanga valleys before reaching the higher ridge camps. That sequence gives your body repeated chances to adjust.
It also helps that the trek repeatedly breaks up the altitude gain with rest or acclimatization moves. For example, you don’t just jump from “high enough” to “summit now.” You spend time near Kibo’s glaciated areas, and you get a dedicated acclimatization day toward Lava Tower. That’s not just for sightseeing. It’s for your lungs and your brain to learn what “thin air” actually feels like.
And yes, the route is known for a very high summit rate (as described in the tour overview). While no one can control weather or personal fitness, Lemosho’s pacing is one of the reasons operators can plan for better outcomes.
You can also read our reviews of more tours and experiences in Arusha.
Getting Started: Arusha to the Londorossi Gate
Your adventure begins back on the ground level of Tanzania. The itinerary assumes you’ll start at 7:30am, with pickup offered and airport transfers included. That’s more important than it sounds, especially if you’re coming in from a flight day with limited sleep. You want the first “logistics step” to be smooth.
On the trekking side, Day 1 begins at the western entrance through Londorossi Gate, which kicks off the walk through montane forest. The forest portion is the “warm-up with meaning” section. The air is thicker down here, the footing is more sheltered, and you can settle into rhythm without starting at full intensity.
I also like that camp logistics are handled early. Tents are set up on your arrival, and your personal belongings are kept inside the camp area for you. In other words, you’re not spending your first evening fighting for time and supplies. It’s one less stressor before altitude takes over.
Day 1–2: Montane Forest to Shira Plateau Views
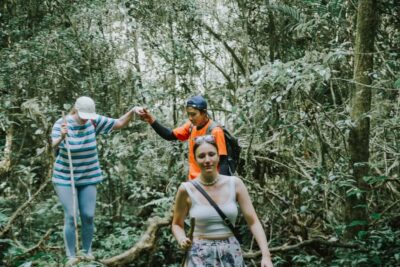
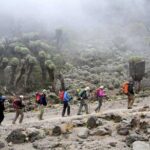
Day 1 is a gentle climb into the Mti Mkubwa area (Big Tree), with camp in the rainforest. You’re hiking for about 3–4 hours on the first day, which is exactly what I want on a Kilimanjaro start. You get going without exhausting yourself.
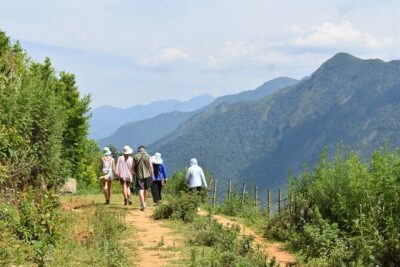
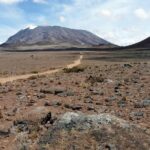
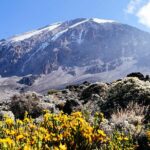
Day 2 continues the upward transition to roughly 3,505m. You leave the forest and step into an open savannah world of tall grasses, heather, and volcanic rock draped with lichen. The scenery isn’t just pretty—it’s a clue that your body is shifting zones. Forest hiking feels easier partly because the air is warmer and oxygen is more available. Open-country hiking can feel sharper even when the distance is similar.
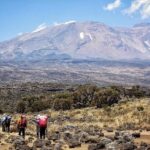
The afternoon brings the Shira ridge and the wider plateau feel. This is where horizon views of Kilimanjaro start to open up. It’s also where you’ll learn the mental difference between hiking “up” in a green world and hiking “up” in a high-altitude desert. The effort stays the same, but the air quality changes fast.
Practical tip: on Day 2, keep your pace calm. When you first see the plateau and think “this looks easier than I expected,” that’s exactly when people accidentally start hiking too hard for the altitude.
Day 3: Shira Plateau Options and Moir Camp in a Gorge
Day 3 is a longer day—up to roughly 4,206m—and it’s where Lemosho starts feeling like its own journey, not just transportation between camps. You explore the Shira plateau and trek east toward Kibo’s glaciated peak.
You also get an option to visit the ancient collapsed Shira cone, described as the oldest of Kilimanjaro’s three volcanoes. That’s a rare chance to connect the hike to the mountain’s geological story without turning the day into a lecture. Even if you just walk through it with your eyes open, you’ll feel like you’re in the right place.
The day ends at Moir Camp situated in a huge gorge at the end of a dormant lava flow. Camp settings like this can be dramatic, and they also matter for temperature. Gorge air can cool quickly after sunset, so you’ll want your layering strategy ready before you settle in.
Drawback to consider: Day 3 includes enough time at altitude that you should treat it as an acclimatization day, even if you’re feeling good. Feeling good is common. The “catch” often shows up later if you push too hard early.
Day 4: Lava Tower Acclimatization, Arrow Glacier, and Barranco Camp
Day 4 is the payoff day for acclimatization effort. You take an acclimatization trek to the Lava Tower at about 4,500m, then continue toward the second junction that brings you up to the Arrow Glacier area.
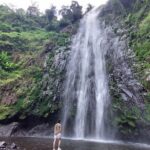
After that, you descend—first back to rest areas, then down into the Senecio forest where you can reach a waterfall prior to finishing at Barranco Camp. Barranco Camp sits in the shadow of the massive Barranco wall, and you may notice clouds drifting from the Barranco Valley. That sounds poetic, and it’s also useful: changing cloud cover often means changing wind and temperature, so being observant helps.
Why this day matters for the summit: the Lava Tower/Arrow Glacier segment is steep enough to challenge your breathing, but structured enough to teach your body. Then the descent into Barranco gives recovery time. That mix is what you want before Day 5 and the higher ridge camps.
If you’re the type who plans every step, here’s what you should do differently: on acclimatization days, practice patience. Keep your steps short. Slow breathing beats heroic strides.
Day 5: Barranco Valley and the South Circuit to Karanga Camp
Day 5 tackles the Barranco Valley and the Barranco wall. This is described as an adventurous stretch that ushers you toward the “arctic zone” of Kilimanjaro. Translation: you’ll feel the shift in temperature and wind, even if you started the day wearing a jacket and feeling fine.
From the Barranco wall, you continue on the South Circuit path through the Karanga Valley and camp at Karanga Camp. The route timing here is important. The goal is to keep moving upward while still giving you time to adjust as the altitude climbs.
What I like about this section is the way it balances effort with progression. You’re not stuck doing the same elevation hike again and again. You’re climbing, but you’re also being guided through valleys and terrain that break the climb into chunks you can handle.
Possible consideration: if you get cold easily, Day 5 can surprise you. When you move out of the warmer zones, your body’s heat loss can feel faster than your legs expect. Bring layers that you can add and remove quickly without wrestling zippers in the wind.
Day 6: Kosovo Camp, Barafu Views, and Summit Prep
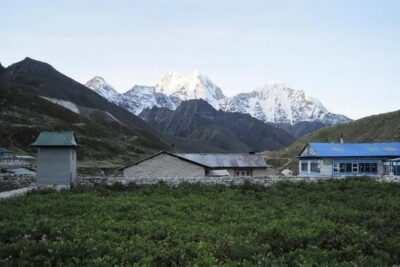
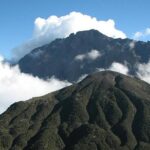
Day 6 starts with a slow pace to Kosovo Camp at about 4,876m. The itinerary notes that you pass Barafu camp, where you’ll get excellent views of Kibo and Mawenzi peaks. That view moment is more than a photo stop. It’s a mental milestone: you’re now close enough to the top zone that the summit day feels like a real plan, not a dream.
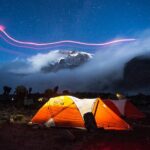
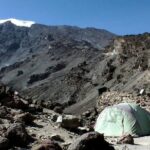
Kosovo Camp sits on an exposed ridge, so you have to be ready for wind and cold. This is one of those nights where the “camp comfort” part of your packing strategy matters. If you expect calm weather just because it’s Africa in your imagination, Kilimanjaro will teach you otherwise.
This day also includes rest, relaxation, and preparation for the summit day ahead. Summit prep isn’t glamorous. It’s logistics and energy management. You want to sleep, hydrate, and keep your mind clear so midnight doesn’t feel like punishment.
In past accounts from the guide team, people described feeling safe and supported through motivation and steady guidance. On summit-eve, that kind of team tone matters because anxiety can build in the hours leading up to the steep start.
Day 7: Midnight Start, Stella Point Sunrise, Uhuru Peak
This is the big day: a midnight start aiming to reach Stella Point for sunrise. The itinerary describes the section as one of the steepest on the non-technical paths of Kilimanjaro. That’s the kind of sentence that makes you sit up and listen.
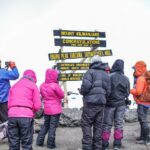
You hike for roughly 6–7 hours to Stella Point, ascending and working toward the crater rim through heavy scree. Then you move onward so that Uhuru Peak is about one hour after Stella Point. From Stella Point you can see the summit, and that short final push is as much mental as physical.
The route goes between the Rebmann and Ratzel glaciers, which is a rare, otherworldly feeling: even if you don’t care about glaciers, you’ll feel like you’re in the high, harsh zone of a world-class climb.
After the summit, you descend to Mweka Camp for dinner and celebration. This part matters because descent is still work. People underestimate how tired you’ll feel from the time you reach the top until you can sit down at camp.
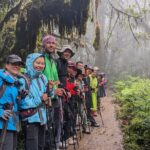
From the guide impressions shared by past groups, one consistent theme is that the leadership uses motivation—songs and encouragement—and also “pushes” in the right way. The best guide energy is not loud bravado. It’s firm pace control and keeping you calm when your mind wants to quit.
Day 8: Mweka Gate, Vehicle Transfer, and That Shower
Day 8 is short but emotionally important. You walk to Mweka Gate, around 1,645m, then your Climb Kili vehicle is waiting to transfer you back for a very welcome hotel shower.
This is where the value of planning shows. If you finish a multi-day trek and have to negotiate transport on your own, the post-summit glow can fade fast. Here, the transport is part of the experience: you’re not just released into the wild after the hard part.
Even though this is a shorter day, you’ll still want to hydrate and eat. Your body has gone through a high-altitude grind, and re-entry to lower altitude can make you feel wobbly even when you’re technically “done.”
Guides, Tents, and Food: What the Price Includes (and Why It Matters)
At $2,480 per person for an 8-day private trek, this isn’t a cheap activity. So the real question is value: what are you buying besides the route name?
You’re paying for a lot that reduces decision fatigue and risk:
- Professional, experienced mountain guides
- All park fees and rescue fees included
- All meals while on the mountain, plus quality mess tents with table and chairs
- Quality, waterproof, four-season private mountain sleeping tents
- Airport transfers included
The tent detail is one I look for on Kilimanjaro. Waterproof and four-season matters because nights near the summit can get brutally cold, and wet weather makes everything harder. “Private” also helps you recover better—less jostling, fewer interruptions, and more control over your own space.
Food matters too. The itinerary lists large portions of fresh, healthy nutritious food. That can sound like marketing, but in practice it’s about calories you can actually use while hiking at altitude. If you’ve ever had a trek where meals are small or repetitive, you know how quickly energy drops.
What you should double-check: tips, Tanzania visa, and your climbing gear are not included. They’re not minor add-ons. If you don’t already own appropriate cold-weather and hiking equipment, you’ll need to budget time and money to get it sorted.
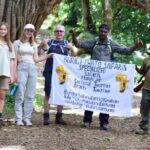
Also, small-group dynamics tend to matter on Kilimanjaro. In the accounts connected to this team, people describe feeling safe and cared for by the mountain staff, plus friendly administrative follow-through by Rosemary. That mix is where “private” becomes more than a word.
Toughness Reality Check: Who This Trek Suits
The tour description says it’s suitable for both beginner and advanced climbers. That’s plausible on Kilimanjaro when the pacing and acclimatization are solid. But “suitable” doesn’t mean “easy.”
Here’s the reality based on the structure:
- You’re moving through multiple altitude zones over eight days, not just two or three
- The summit night is steep and long, with a midnight start and heavy scree on the way to Stella Point
- Kosovo Camp is on an exposed ridge, which can make cold and wind feel more intense
- You need moderate physical fitness level for the overall schedule
If you’re a beginner, you’ll likely be fine as long as you listen to your guide, keep your pace steady, and don’t treat the summit day like a race. If you’re more experienced, you may still appreciate the organization—especially the acclimatization day and the structured plan to manage the final push.
Who should consider another option: if you have serious anxiety about steep climbs or if altitude issues have derailed you in the past. This route has strong pacing, but your body still decides how it responds.
Should You Book This 8-Day Private Lemosho Trek?
I’d book it if you want a Kilimanjaro climb that’s structured, safety-minded, and built around getting acclimatized rather than “going hard and hoping.” The combination of Londorossi gate start, Shira plateau walking, the Lava Tower acclimatization day, and the Barranco/Karanga progression is a strong match for people who want the mountain instead of just a checklist of camps.
I’d think twice only if you know you struggle with cold, wind, or exposed ridge conditions. Kosovo Camp makes that a real factor, and summit night will be tough even for fit hikers.
If you do book, plan to bring your A-game on sleep, hydration, and layering. Also, don’t ignore the human part of the climb. The team energy—seen in the way guides like Gasto, Joe, and Jeff support people and keep morale up with songs—can make the difference between “surviving the climb” and actually enjoying the whole journey.
FAQ
What is the start time for this trekking experience?
The trek starts at 7:30am.
Where does the 8-day trek begin?
It begins in Arusha, and the trek itself starts from the western side at Londorossi Gate.
How long is the trek?
The duration is 8 days (approx.).
Is this a private tour?
Yes. It is described as a private tour/activity, so only your group will participate.
What route does the trek follow?
It follows the Lemosho route on Mount Kilimanjaro.
Are park fees and rescue fees included?
Yes. The included list states that all park fees and rescue fees are covered.
What camping setup and comfort are included?
You get quality, waterproof, four-season private mountain sleeping tents, plus quality mess tents with table and chairs.
Are meals included?
Yes. All meals while on the mountain are included, with dinner, breakfast, and lunch listed during the trek.
What is not included in the price?
Tips, the Tanzania visa, and personal climbing gear are not included.
Is pickup or airport transfer included?
Yes. Pickup is offered, and airport transfers are included.