REVIEW · ARUSHA
7 Days Machame Route Kilimanjaro Trekking
Book on Viator →Operated by Mafie Adventures · Bookable on Viator
Seven days on Kilimanjaro feels like a full-body course. This Machame route trek is popular for a reason: you get a stack of habitat changes, then a summit plan with clear pacing and milestones. I love how the trek’s rhythm builds in altitude gradually, and I also love the day-to-day camp support that keeps you focused on walking (tents get set up, water is organized, and meals are handled). One thing to consider upfront is the cold: multiple nights are genuinely freezing, especially on exposed ridges.
What makes this itinerary especially practical is the mix of hiking styles. You’ll do rainforest ascent, high moorland crossings, and then rougher rocky sections in the semi-desert and alpine desert—so your body learns without feeling randomly thrown into the deep end. I also like the way the summit attempt is handled: you wake early, follow a defined route to Stella Point, and then continue with the sunrise in your sights.
The possible drawback is not the distance on paper—it’s the conditions that come with it. Rain, mud, fog early on can slow you down, and on summit and high-camp days you’ll be moving in wind and cold with limited water access where routes don’t offer it.
In This Review
- Key Highlights You’ll Feel on the Mountain
- Why the Machame Route Gets Picked So Often
- Price and Logistics: What $2,200.11 Buys (and What It Doesn’t)
- Day 1 From Arusha to Kilimanjaro National Park Gate: Rainforest Reality (18 km, ~7 hours)
- Day 2 Shira Camp at 3,840 m: Moorland Crossings and Glacier Views (9 km, ~6 hours)
- Day 3 Lava Tower at 4,630 m: Semi-Desert Push and a Descent to Barranco (15 km, ~7 hours)
- Day 4 The Great Barranco Wall: “Class 2” Acclimatization That Feels Like Real Climbing (5 km, ~4–5 hours)
- Day 5 Karanga to Barafu Ridge: Intersection With the Mweka Route and No Water at Camp (4 km, ~2–3 hours)
- Day 6 Summit Night to Uhuru Peak: Stella Point, Sunrise, and the Long Descent
- Day 7 Celebrations at Mweka Gate: Certificates, Tips, and Forest Closing Steps (3 hours, ~15 km)
- The Crew Experience: Guides, Porters, and That Calm-Competent Feeling
- Packing and Prep That Matches This Specific Trek
- Should You Book the 7 Days Machame Route?
- FAQ
- What time does the trek start each day?
- Where does the trek begin and end?
- Is pickup from Arusha included?
- Are park admission tickets included?
- What trekking equipment is included?
- What happens on summit day?
- How do certificates work?
Key Highlights You’ll Feel on the Mountain
- Habitat changes, day after day: rainforest to moorland to semi-desert to alpine desert
- Summit-night timing: wake around 23:30 with tea and biscuits, then reach Stella Point (5685 m) before sunrise
- Support that keeps you moving: porters register you, pack gear, set tents, and help manage water
- Big moments built into the trek: Lava Tower option and the Great Barranco Wall acclimatization hike
- Clear summit rewards: green certificates for Stella Point, gold for Uhuru Peak
- Private group setup: your group climbs together, not mixed into a crowd
Why the Machame Route Gets Picked So Often
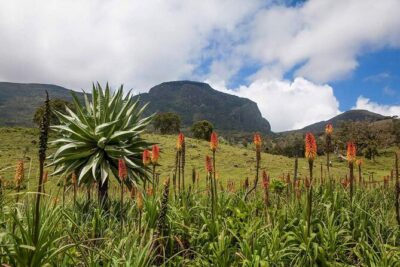
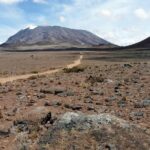
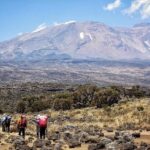
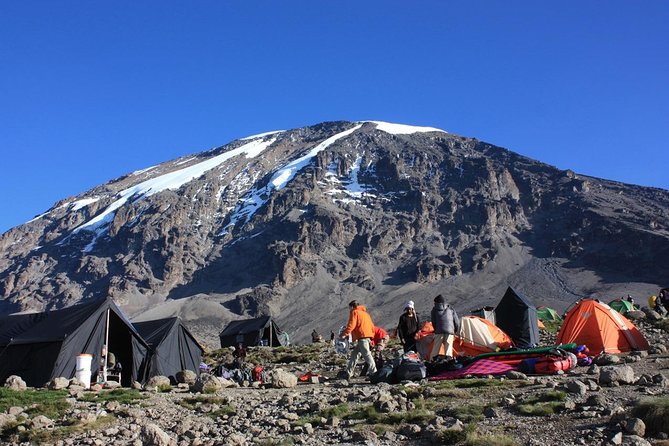
Machame is one of Kilimanjaro’s go-to routes because it delivers variety without dragging on forever. You’re not stuck hiking the same kind of trail every day. Instead, you pass through multiple ecosystems—montane forest, moorland heathland, semi-desert, and alpine desert—so the trekking feels like you’re leveling up through different worlds rather than just getting higher.
There’s also a value angle. Machame is often chosen because it’s more “reachable” in terms of access and fits a shorter itinerary than some alternatives. That matters if you’re trying to reduce the time you’re away from work, family, or travel logistics in Tanzania. And because many climbers choose Machame, the pacing tends to be tested and repeatable, which is what you want when the stakes are altitude.
Still, “popular” doesn’t mean “easy.” The payoff is worth it only if you respect the mountain: you’ll feel altitude creeping in around the higher camps, and summit day is always a grind.
You can also read our reviews of more tours and experiences in Arusha.
Price and Logistics: What $2,200.11 Buys (and What It Doesn’t)
At $2,200.11 per person, you’re paying for a fairly complete climbing package. The big included value points are:
- Camping setup (mess tent, mattress, cooking equipment)
- All accommodation on the route
- Porterage and chef-managed meals
- Rescue fees, parking fees, and taxes/VAT
- Lunch, dinner, and breakfast across the trek (breakfast 6x, dinner 6x, lunch 7x)
You’ll also get pickup offered from Arusha and a professional driver/guide, which helps a lot when you’re starting at 4:00 am.
What’s not included is where you have to plan ahead:
- Climbing gear rental and sleeping bag rental (available, but not included)
- Bath towels
- Tips
- International flights
- Visa fees and travel insurance (not listed as included)
For value, the key is this: you’re not scrambling to coordinate camp staff, food, or basic rescue logistics. If you’ve ever tried to organize a route like this on your own, you know it turns into a complicated puzzle fast. Here, most of that puzzle is already assembled.
Day 1 From Arusha to Kilimanjaro National Park Gate: Rainforest Reality (18 km, ~7 hours)
You’ll start with an early push out of Arusha (about 1400 m). Breakfast comes first, then you’re driven to Machame Village. Once there, you can pick up mineral water, grab a packed lunch, and then either continue by short vehicle route or walk the remaining stretch to Machame Gate (about 1490 m).
At the gate, your porters take over the practical work—organizing and packing belongings—while you and your guide handle registration with TANAPA (Tanzania National Park). Then comes the rainforest ascent.
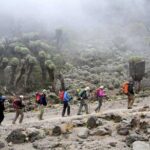
In the montane forest, expect rain, mud, and fog. That’s not a scare tactic; it’s simply what the trail can be like. Bring the mindset that day one is about steady movement, not comfort. If you stay loose and consistent, the first day becomes a warm-up for how variable weather will be for the rest of the climb.
Why this day matters: you’re getting your legs used to trekking at altitude, and you’re learning how your body handles wet trail conditions before the higher, colder environments.
Day 2 Shira Camp at 3,840 m: Moorland Crossings and Glacier Views (9 km, ~6 hours)
Day two shifts you away from rainforest and into moorland. You’ll ascend out of the wet greenery and into heathland vegetation, crossing streams and walking over a rocky ridge.
The reward comes when you reach the Shira Camp (3840 m). You’ll be near a stream, and the views are the point: you can see the Western Breach and glaciers in the distance. High-altitude views are one of the reasons this route stays popular, but Shira adds something extra—it’s a moment where you look across real terrain and feel the mountain’s scale.
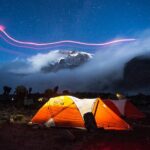
Sleep planning is critical here. Shira Camp is exposed, and temperatures can drop below freezing. Your tents are set up before you arrive, and porters prepare drinking and washing water, with snacks and dinner afterward. Even with camp support, you’ll want to treat warmth seriously.
Drawback to watch for: the air can feel thin even before you “feel sick.” If you get a mild headache or feel breathless on the ridges, it’s a cue to keep your pace controlled.
Day 3 Lava Tower at 4,630 m: Semi-Desert Push and a Descent to Barranco (15 km, ~7 hours)
You’ll leave moorland behind and enter semi-desert and rocky terrain. After about 5 hours walking east, you come face to face with Lava Tower (4630 m).
Lunch is served at the tower. There’s also an option: if conditions allow, hikers can climb Lava Tower itself. This is a classic “optional but memorable” moment. Just be ready for how altitude hits at this point. It’s common to feel the effects—headaches and shortness of breath—especially if you rush or push too hard early.
After lunch, you descend to Barranco Campsite (3950 m). Even though it’s a descent, it still takes effort: rocky ground at altitude can be tiring. Your goal is to reach camp feeling steady, not exhausted.
Why day three matters: it’s where the trek’s difficulty becomes real. You get a taste of the summit zone environment without jumping straight into summit-night stress.
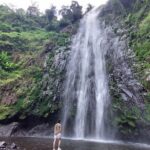
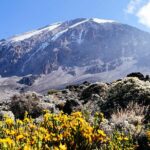
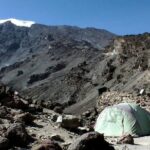
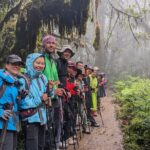
Day 4 The Great Barranco Wall: “Class 2” Acclimatization That Feels Like Real Climbing (5 km, ~4–5 hours)
Day four is a favorite for many climbers because it’s short-ish and focused, but still has a satisfying challenge. After breakfast, you tackle the Great Barranco Wall. At first glance it looks intimidating, but this is described as a Class 2 hike, and hikers often find it easier than expected.
At the top, you can look toward Heim Glacier, and you may be above the clouds. That’s a huge psychological boost. High points tend to feel like the mountain is letting you in on its secrets.
Then the trail continues through Karanga Valley, with up-and-down sections that help your body adjust without overwhelming you. That’s what acclimatization days should feel like: purposeful, not punishing.
Tip for your day: keep your steps deliberate. The wall is one of those spots where rushing turns “fun difficulty” into “burn.”
Day 5 Karanga to Barafu Ridge: Intersection With the Mweka Route and No Water at Camp (4 km, ~2–3 hours)
After leaving Karanga Camp (~3959 m), your trail intersects with the Mweka Route—the same route used for descent on the final two days. That’s helpful because it means you’re gradually aligning with the downhill path, which can reduce confusion and keep navigation simpler.
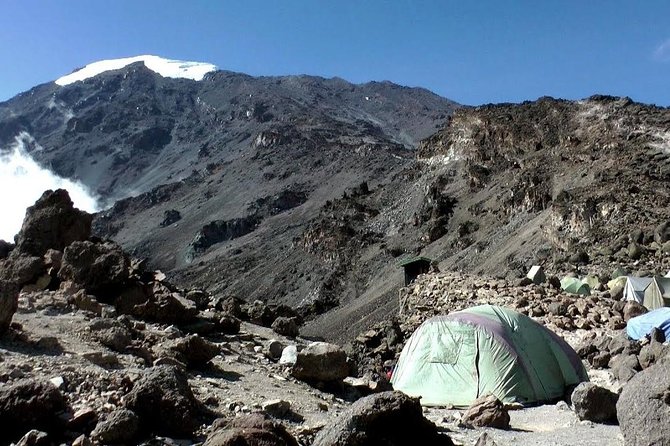
As you hike for about an hour, you reach Barafu Hut (4550 m). Barafu Camp is on a rocky, exposed ridge. It’s also the key water logistics warning in this itinerary: it’s described as the last water stop, because there is no accessible water at Barafu Camp.
So day five is partly about hiking and partly about resource management. You’ll want to finish water planning early so you don’t end up rationing when the conditions get tough.
The campsite can be windy with rocks, and your tents will be exposed. Familiarize yourself with the campsite before dark. You’ll need that peace of mind so you can sleep well enough for summit night.
Reality check: even if day five looks short, it’s a set-up day. Your energy, warmth, and water usage decide how summit day feels.
Day 6 Summit Night to Uhuru Peak: Stella Point, Sunrise, and the Long Descent
This is the day. Your guide will wake you around 23:30 for tea and biscuits. Then you begin your summit attempt.
The route heads northwest, ascending over stone scree. This is often described as the most mentally and physically challenging part of the climb. You’ll likely feel it as grinding effort at low oxygen—slow steps, frequent checks of your breathing, and lots of patience required.
In about 6 hours, you reach Stella Point (5685 m) on the crater rim. The plan includes a sunrise moment here. After enjoying the sunrise, you continue for about 2 more hours on a snow-covered trail to Uhuru Peak (5895 m).
Then comes the long part: descending takes about 7–8 hours to reach Mweka.
What to expect emotionally: summit day is rarely one big heroic sprint. It’s a series of micro-goals—walk to the next break, breathe until your legs loosen, and keep moving until the mountain starts feeling routine again. If you go into it calm, you’ll handle it better.
Day 7 Celebrations at Mweka Gate: Certificates, Tips, and Forest Closing Steps (3 hours, ~15 km)
After breakfast, your staff runs a celebration on the mountain. Expect dancing and singing, and then it’s time for the part that feels both personal and practical: you present tips to the guide, assistant guides, chefs (if you have them), and porters.
Then the official completion step arrives. Hikers are required to sign their names to receive certificates:
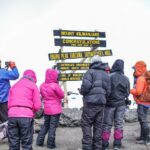
- Reach Stella Point (5685 m): green certificate
- Reach Uhuru Peak (5895 m): gold certificate
After certificates, you descend for about three hours back to Mweka Gate, and then continue down into the Mweka village for roughly 1 more hour (around 3 km). Day seven is your decompression phase. You’re tired, but the forest return tends to feel like air flowing back into your body.
Why this ending matters: you get closure that’s more than just “we’re done.” It’s a ceremony built around the achievement.
The Crew Experience: Guides, Porters, and That Calm-Competent Feeling
On a trek like this, the crew makes or breaks the vibe. When things get cold and slow, you want people who manage the schedule and keep your group steady.
From the tour team named in past experiences connected to Mafie Adventures, you may see guides such as Ombeni and Safaeli, or Oliver and Mathew, and Godlove. There’s also an associated team figure, Erastus, who has been part of guests’ communications.
Even without obsessing over names, here’s what you should look for in the way the trip operates:
- porters taking on the gear logistics from Machame Gate
- tents set up before you arrive at camp
- a chef-led meal structure with dinner and snacks
- summit-night basics like tea and biscuits timing
That’s the real comfort: not luxury, but competence. And the celebration on the final day makes the whole process feel human, not mechanical.
Packing and Prep That Matches This Specific Trek
This climb asks for gear and discipline that fit the conditions described.
Because climbing gear and a sleeping bag are available for rent but not included, plan to confirm what you’ll need before you arrive. Also, ask yourself if you’ll actually be okay sleeping in conditions where the itinerary notes below-freezing temperatures at exposed camps.
Here’s what you should prep for based on what the route signals:
- Cold nights at Shira and the exposed ridge feel (below freezing mentioned)
- Rain, mud, fog on the rainforest day
- Wind and rocks around Barafu Camp
- Altitude effects around Lava Tower (headaches and shortness of breath are expected)
For summit night, treat warmth as a system, not a single layer. And for your feet, treat day one and day three as sock-to-sock test days. Your comfort on those determines how well you sleep later.
Should You Book the 7 Days Machame Route?
Book it if you want a route that mixes scenery change with solid pacing, and you like the idea of a clearly timed summit plan that hits Stella Point before sunrise. It’s a strong match if you want value in the sense that most moving parts—camp, food, rescue and key fees—are already handled for $2,200.11.
I wouldn’t book it if cold-weather camping scares you, or if you’re not ready for long, tough days like the summit attempt and the big descent. Even with support, you’ll be dealing with freezing nights, wind exposure, and altitude pressure.
If you’re fit, calm, and willing to follow your guide’s pace, this Machame trek is a great way to experience Kilimanjaro as more than just a checklist. You’ll earn your ending step by step, and then you’ll get the kind of certificate moment you’ll remember long after the trek dust settles.
FAQ
What time does the trek start each day?
The activity starts in Arusha at 4:00 am, and the summit attempt day includes an early wake-up around 23:30 for tea and biscuits.
Where does the trek begin and end?
It starts in Arusha, Tanzania and ends back at the meeting point.
Is pickup from Arusha included?
Yes, pickup is offered.
Are park admission tickets included?
Yes. The itinerary notes Admission Ticket Free for the days listed.
What trekking equipment is included?
The trip includes camping equipment such as a mess tent, mattress, and cooking equipment. Climbing gear and a sleeping bag are available for rent but are not included.
What happens on summit day?
You’re woken around 23:30, reach Stella Point (5685 m) after about 6 hours, then continue to Uhuru Peak (5895 m). After that, you descend for about 7–8 hours to Mweka.
How do certificates work?
You sign your name to receive a certificate at the end. Green certificates are given for reaching Stella Point, and gold certificates are given for reaching Uhuru Peak.