REVIEW · LOMBOK
Rinjani Trekking 2D1N Senaru Crater rim
Book on Viator →Operated by Rinjani Sunrise · Bookable on Viator
Rinjani gets real, fast. This 2D1N-style trek (really 3D2N) is built around the Senaru Crater rim, with the payoff views of the Lake and the Baby Volcano. You also get a night in Senaru, then a night in a tent on the Rinjani trekking side, so the experience feels like two different worlds.
I like the way the route is designed for people who are new to trekking. The company positions this as beginner-friendly and even works for families with kids (minimum 10 years old), as long as you have moderate fitness. I also really like the logistics: transfers in/out, a night of accommodation the day before the trek, and full-board meals during the trek mean you’re not stuck figuring everything out.
The main drawback is simple: weather and cold. This hike depends on good weather, and at high altitude it can get extremely cold—down to minus temperatures—so you’ll want the right layers (or plan to rent a coat on the spot).
In This Review
- Key moments you’ll remember from the Senaru Crater rim route
- Getting to Senaru and starting with a clear 8:00 am plan
- Day-before arrival: why that extra Senaru night is more valuable than it sounds
- Day 1: transfers, trail time, and optional waterfall walking
- Day 1 night: tent camping on Rinjani and how the camp setup changes everything
- Day 2: the main climb toward the Senaru Crater rim
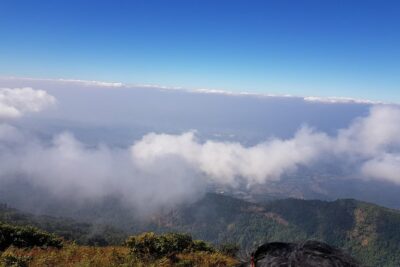
- The view payoff: Lake and Baby Volcano from the second-summit perspective
- Meals and camping gear: included comforts that protect your energy
- Guides, porters, and how the team affects your success
- Price and value: is $262.91 per person fair?
- What to bring (and what you can rent) for minus-temperature nights
- A note on communication and confirmation: avoid the one-off booking snag
- Who should book this Senaru Crater rim trek?
- Should you book this tour?
- FAQ
- How long is the Senaru Crater rim trek?
- What time does the trek start?
- What’s the minimum age for this trek?
- How fit do I need to be?
- What’s included in the price?
- What should I bring or rent for cold weather?
Key moments you’ll remember from the Senaru Crater rim route
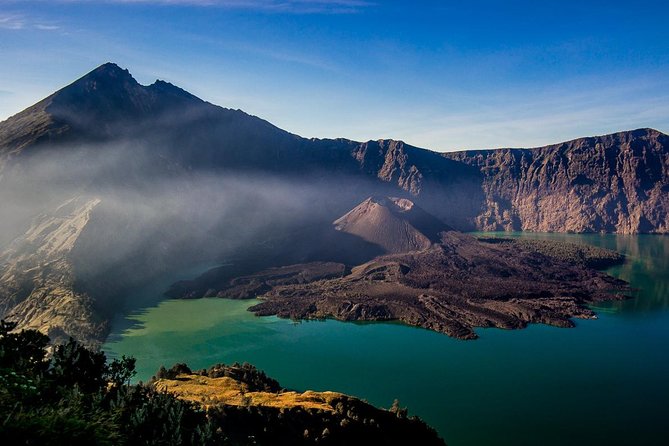
- Senaru Crater rim, for Lake + Baby Volcano views from the trekking highlight point
- A split stay: one night in Senaru lodging, one night camping on the mountain
- Support that matters: guide expertise and porters who help make a challenging hike feel doable
- Practical inclusions: tent setup plus sleeping bags and mattresses, and meals through the trek
- Night-sky potential: camp timing and setup can give you a chance to enjoy the Milky Way (if conditions are clear)
Getting to Senaru and starting with a clear 8:00 am plan
This trip is centered on Lombok’s Senaru area, and it’s structured so you’re not rushing in last minute. You get 1 night accommodation a day before the trek, then the trek itself starts at 8:00 am. That matters because altitude treks punish mistakes like bad timing and zero sleep.
Pickup is offered, and transfers in and out are included. In practice, that takes away the biggest headache: getting to the trail and back on schedule. You also get a mobile ticket and group discounts, which is handy if you’re traveling with friends.
One smart thing here: the tour is private, meaning only your group participates. That can make it easier to set expectations and manage the pace, especially if your group includes beginners or a mix of ages.
You can also read our reviews of more tours and experiences in Lombok.
Day-before arrival: why that extra Senaru night is more valuable than it sounds
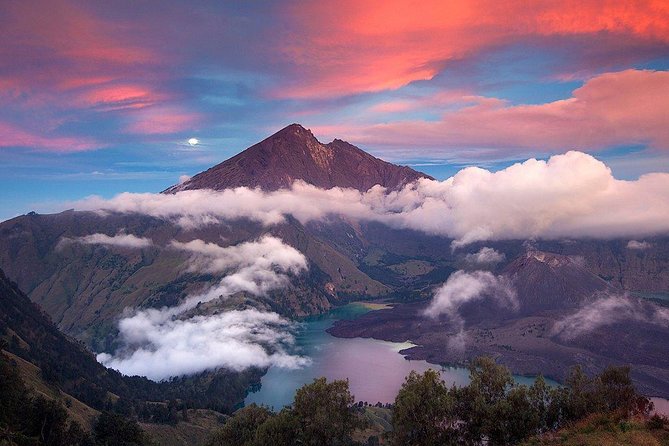
That pre-trek night isn’t just a formality. It gives you time to settle in Senaru and prepare for a hike that can be physically demanding even if you’re considered beginner-friendly. You also have a better chance of being ready when the 8:00 am start comes, instead of scrambling to pack, eat, or organize layers.
Since the trek is described as suitable for moderate physical fitness, that buffer night helps you stay in the right mindset. You’ll be able to review what to wear, check your trekking shoes, and mentally set your expectations for cold weather later on.
Day 1: transfers, trail time, and optional waterfall walking
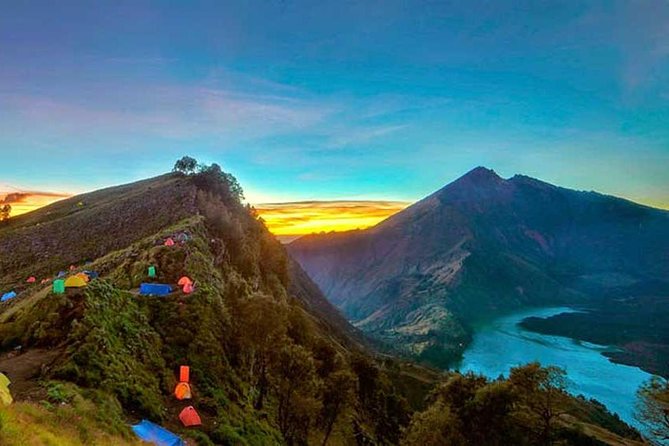
On Day 1, your day starts with the trek plan and then builds toward the crater rim experience. The tour includes all entrance fees, plus full-board meals during the trek, so you’re not hunting food stops or paying random add-ons mid-hike.
There’s also a key detail about water features: a panorama walk to Sindang Gile and Tiu Kelap Waterfall is included only if you choose the private tour option. If that’s important to you, look at your booking choice carefully and make sure this add-on is part of your package.
This kind of waterfall walk is a good use of energy at the beginning. It helps you stretch into the terrain, see the area’s jungle vibe, and get into the rhythm of a guided trek. Just remember: even a scenic walk on Rinjani can still feel like work once the temperature starts shifting.
Day 1 night: tent camping on Rinjani and how the camp setup changes everything
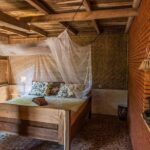
Your second “chapter” begins with camping gear included. The essentials are provided: an tent, a toilet tent, and sleeping bags plus mattresses. This is a big deal because comfort affects safety. When you can sleep, you climb better on the next day.
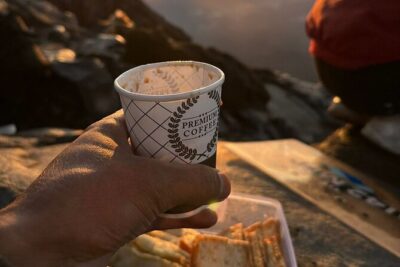
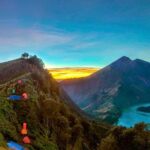
Many treks on volcanoes focus on the view but ignore the night. Here, camp is treated like part of the experience. In one account, the camp setup allowed someone to enjoy the sunset and the Milky Way from camp, which tells you the team is thinking about where you’ll be placed.
Still, don’t treat camping as casual. You’re at high altitude, and the tour notes cold can reach minus temperatures. Even with sleeping gear, you should bring whatever warm layers you’re told to use, and plan your clothing like it’s a mountain night, not a beach camp.
Day 2: the main climb toward the Senaru Crater rim
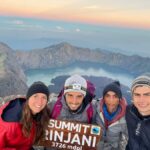
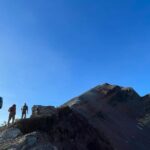
This is the day that earns the whole trip. The route is designed to reach the Senaru Crater rim, which is often called the second summit of Rinjani based on the views. Your goal is to get to the best point where you can see the Lake and the Baby Volcano.
Expect this to feel like a true trek day, not a casual hike. The hike can take 5+ hours depending on conditions, and you’ll be moving through terrain that demands steady effort. The fact that it’s still marketed as suitable for beginners comes down to the support you get: the guide manages the pace, and the porters help with camp operations and gear.
That support is praised again and again, including by people who had guides like Ir and Irsyad, plus guides such as Edi. What you should take from that: the guide’s job isn’t only navigation. It’s also encouragement, timing breaks, and making sure you’re not overexerting early.
The view payoff: Lake and Baby Volcano from the second-summit perspective
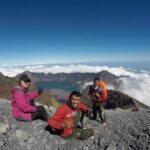
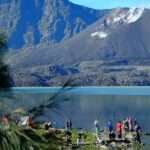
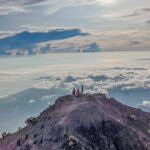
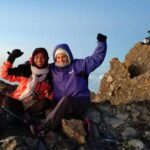
When you reach the crater rim area, the trek shifts from effort to reward. The big idea is the crater rim viewpoint where you can see the Lake and the Baby Volcano. This is why Senaru Crater rim hikers often call it the second summit—because the scene feels like a high achievement, even though it’s not the top peak.
What I’d emphasize for you is how dependent this is on visibility. The tour is weather-dependent, and that’s not a small detail on a volcanic mountain. If fog or cloud rolls in, your view may be muted, even if the hike still happens as planned.
Also, treat the rim as a viewpoint, not a long hangout. Cold can be intense, so bring layers you can actually wear comfortably at altitude. Use the time at the top to take in the views, snap pictures, and then get back to warmth when you need it.
Meals and camping gear: included comforts that protect your energy
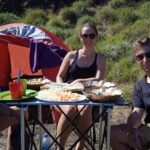
The tour is clear about full boards meals during the trek, and it includes camping gear. In practical terms, this reduces two common problems: inconsistent food and missing gear that forces you to buy expensive replacements later.
Here’s what’s specifically included for camping: tent, toilet tent, sleeping bags, and mattress. If you’re traveling light, that’s helpful. If you’re traveling with extra stuff, it still helps you avoid the worst-case scenario of showing up without mountain sleep gear.
Food matters more than people expect on this kind of climb. When your meals are built into the plan, you can focus on pacing and hydration. The accounts you’ve been given consistently mention satisfying food and careful preparation, which is what you want when the day is cold and your body is working.
Guides, porters, and how the team affects your success
On a trek like this, your guide can be the difference between stressed and steady. The experience is frequently praised for guide knowledge and team support, with names like Ir, Irsyad, Mus, Mu, and Edi showing up in different accounts. You’ll also see mention of a person named Amants handling briefing and transfers.
That’s useful information for how you should judge the booking. Look for a team that organizes the basics well: briefing, timing, and camp setup. Even if you’re physically fit, sloppy organization can make you tired before you start the climb.
Porters are part of the reason the trek can be approachable for beginners. They carry key items and help keep the camp running. That doesn’t mean you’ll be carried, but it does mean you’re not fighting extra weight on your own legs.
Price and value: is $262.91 per person fair?
At $262.91 per person, this trek isn’t a cheap afternoon. It’s also not a bare-bones hike where you pay extra for everything. Your money goes toward a bundle of real costs: transfers in/out, a night of Senaru accommodation, entrance fees, full-board meals, and camping equipment.
Then there’s the labor piece: you have a guide and porters, plus the team handling camp logistics. Those are expenses people often ignore when they compare tour prices. Here, the included gear (tent, sleeping bags, mattress, toilet tent) also saves you from renting or buying multiple items.
Another value point: the pace is managed, and the tour is designed to fit beginners and families (minimum 10). If that fits you, you’re paying for safety, structure, and support—not just a view.
Your value check should be weather-related too. The tour requires good conditions, and if weather cancels it, you’re offered another date or a full refund. If you cancel on your own, the amount you paid isn’t refundable. That means you should only book when you’re comfortable committing to that time window.
What to bring (and what you can rent) for minus-temperature nights
The essentials are straightforward. Use trekking or hiking shoes with good grip. That’s the big non-negotiable for footing. You don’t need special brand names; you do need confidence on muddy or uneven ground.
For cold protection, the tour specifically calls out tick coat or jackets. If you don’t have one, you can rent on the spot. It also calls out long pants because it’s very cold at high altitude, reaching even minus temperatures. Plan to dress like you mean it.
One more thing: any personal medicine is not included. So if you use prescriptions or have a standard kit, bring it. Don’t rely on a mountain stop to handle your needs.
A note on communication and confirmation: avoid the one-off booking snag
One negative experience highlighted poor organizing around confirmation details. The lesson for you is simple: confirm the booking properly, make sure you have the right arrival date, and keep your communication clear with the provider. If you’re asked for details, send them the first time and double-check that everything is matched to your plan.
That kind of hiccup isn’t something you want on a tight schedule. The rest of the feedback paints a picture of strong service, but you still want your end of the process to be clean.
Who should book this Senaru Crater rim trek?
This trek is a strong fit if you want crater rim views without committing to a long multi-day high-altitude program. It’s suitable for beginner hikers and for families with kids 10 and up, as long as you have moderate fitness.
You’ll enjoy it most if you like structured days, clear start times, and a team that sets up camp. It also works well if you’re traveling with a group and want a private experience where your pacing and needs are considered.
You should think twice if you know you struggle with cold weather or if you dislike hikes that can last several hours at altitude. Even though it’s beginner-friendly, it’s still a real mountain climb with significant exposure to wind and chill.
Should you book this tour?
Book it if:
- You want Senaru Crater rim views of the Lake and Baby Volcano
- You value included comfort like camping gear and full-board meals
- You prefer a supported trek with a guide and porters who handle logistics
- Your group fits the minimum age (10+) and you’re comfortable with moderate fitness
Skip it or choose another option if:
- You can’t handle cold, and you don’t have long pants and proper warmth planned
- Your travel dates are fixed and you’d rather not deal with weather-dependent outcomes
- You’re the type who might cancel last minute, since the trip is non-refundable if you cancel yourself
FAQ
How long is the Senaru Crater rim trek?
It’s marketed as a 2 days 1 night experience, but it’s actually a 3 days 2 nights plan: 1 night at accommodation in Senaru and 1 night camping on the Rinjani trek.
What time does the trek start?
The start time is 8:00 am.
What’s the minimum age for this trek?
The tour is suitable for families with children, with a minimum age of 10 years old.
How fit do I need to be?
You should have moderate physical fitness level.
What’s included in the price?
Included items are full-board meals during the trek, all transfers in and out, 1 night accommodation the day before the trek, all entrance fees, camping gears (tent, toilet tent, sleeping bags, and mattress), plus a guide and porters.
What should I bring or rent for cold weather?
You should plan for trekking shoes with good grip and bring long pants for very cold temperatures. If you don’t have a tick coat or jacket, you can rent one on the spot.