REVIEW · KATHMANDU
Gokyo Valley Trek
Book on Viator →Operated by Ace the Himalaya · Bookable on Viator
Gokyo Ri hits you fast with huge views. This 15-day Khumbu trek pairs a classic Lukla start with a well-managed climb through Sherpa villages, then lands you above Gokyo Lake for the massive Ngozumpa Glacier panorama. I love how Gokyo Ri (5,483m) puts Everest-range peaks (Everest, Lhotse, Makalu, Cho Oyu, and Gyachung Kang) into one clean sweep, and I like that the plan builds in an acclimatization day in Namche instead of treating altitude like a speed bump. The main drawback to consider is that you’re working around mountain weather and Lukla flight timing, so you need some flexibility.
What makes this trip feel practical is the support structure: you get a licensed English-speaking trekking guide, a porter for every two clients, and key overnight gear (a down jacket and sleeping bag) so you’re not guessing what’s warm enough. In Kathmandu you’re not left to figure things out alone either, with airport transfers, guided sightseeing, and a spare day to recover. Just keep your expectations realistic: this is a hike at altitude, not a casual stroll.
In This Review
- Key Highlights Worth Booking For
- Kathmandu: Temples, Old Squares, and Getting Your Feet Under You
- The Lukla Flight: Where the Trek Really Starts
- Phakding to Namche: Bridges, Sagarmatha National Park, and the First Step Up
- The Namche Acclimatization Day: Museum, Syangboche Views, and Oxygen Control
- Phortse and the Way Up: Rhododendron Forests and Khumbu Character
- To Machhermo and Gokyo Approach: Glacier Territory Without the Chaos
- Gokyo Valley Basecamp: Lodges, Lakeside Views, and Glacial Scale
- Gokyo Ri Sunrise: The 30-Minute Climb That Changes Everything
- Descending to Dole, Then Sliding Back Toward Namche
- Kathmandu Return and Your Spare Day for Resetting
- Price and Logistics: What $1,514.67 Really Buys You
- Who This Trek Fits Best (and Who Should Rethink)
- Booking: Should You Book the Gokyo Valley Trek?
- FAQ
- How long is the Gokyo Valley Trek?
- Where does the trip start and end?
- Is pickup offered in Kathmandu?
- What’s the maximum group size?
- Do I need a guide and porters?
- Is trekking gear included?
- What altitude highlights are on the route?
Key Highlights Worth Booking For
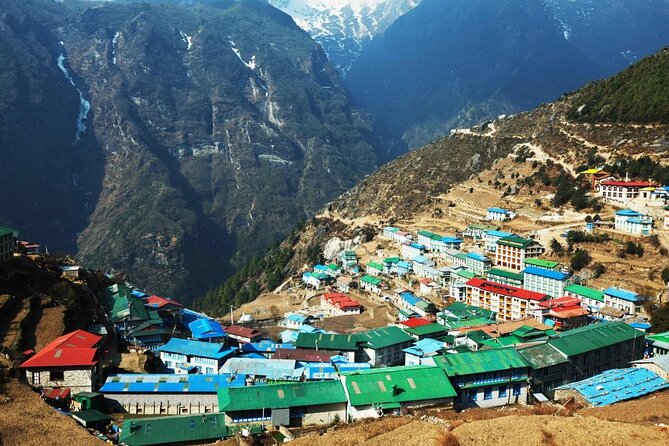
- Gokyo Ri at 5,483m for standout Everest-region skyline views
- Ngozumpa Glacier views during the approach to Gokyo Valley
- Real acclimatization with a full day in Namche before going higher
- Sherpa village life with monasteries and local lodges along the way
- Guides and porters paired to your group (1 porter for every 2 clients)
- Provided trekking gear: down jacket and sleeping bag (returned after)
Kathmandu: Temples, Old Squares, and Getting Your Feet Under You
Your trek begins in Kathmandu, and the first couple days are a smart warm-up. You’ll land at Tribhuvan International Airport, meet an airport representative, and transfer to your hotel in a private vehicle. Then the sightseeing is paced so you can recover from travel rather than sprint through the city.
On Day 2 you’ll see three major “big faith” stops. Pashupatinath Temple is an iconic Hindu site on the Bagmati River. You can’t go inside, but you can see the temple and daily activity from the eastern bank—worth doing because it gives you a feel for how alive these traditions are. Next is Boudhanath Stupa, one of the holiest Buddhist sites in Kathmandu. You’ll notice the prayer wheels turning and the steady flow of pilgrims moving around the stupa. Then you move to Bhaktapur Durbar Square, which gives you a different flavor: old royal architecture, temples, and the dense, carved detail that makes Bhaktapur feel like a living museum.
Why this matters for your trek: Kathmandu sightseeing helps you get oriented, practice local logistics (money, timing, walking pace), and keep your mind off the altitude for a short window. It’s also a good reminder that the people here aren’t just scenery on the way to mountains—they have their own deep daily rhythms.
You can also read our reviews of more tours and experiences in Kathmandu.
The Lukla Flight: Where the Trek Really Starts
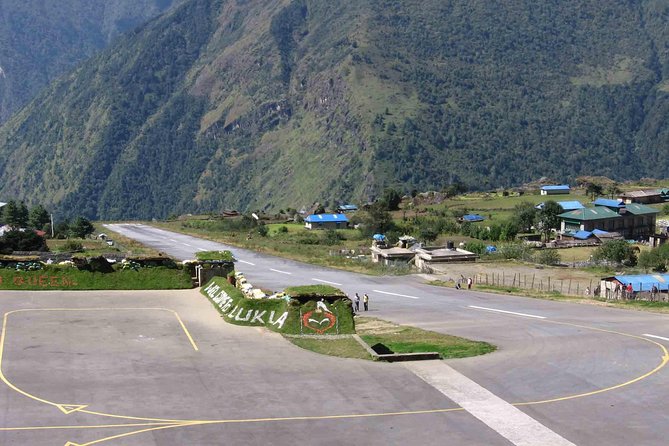
The trek itself kicks off after an early start. You fly from Kathmandu to Lukla (2,804m). This is a “short flight, big change” kind of moment. Lukla doesn’t ease you in with low elevation walking—it immediately puts you into the rhythm of Khumbu trails.
After landing, a guide briefs you and introduces your porters before you begin. Then it’s down and up as you settle into trekking mode. One nice detail here: the trip includes sorting and loading of trekking equipment, so you’re not dealing with luggage chaos while your body is already adapting.
What to expect practically:
- Your walking schedule starts gently with descending sections.
- You’ll get brief time in Phakding to explore the village while gear is handled.
- The trail includes suspension bridges over the Dudh Kosi River later, so you’re not walking only on flat, forgiving paths.
Phakding to Namche: Bridges, Sagarmatha National Park, and the First Step Up
Day 3 is a classic transition day. You descend toward the Dudh Kosi River, cross the main trail, then reach Phakding after passing through small villages like Ghat. The walking is described as easy, which is exactly what you want on Day 3: get your legs moving, don’t tax them.
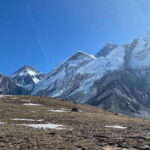
On Day 4 you move to Namche Bazaar, often called the gateway town for Everest-area trekking. The trail tracks along the Dudh Kosi with multiple river crossings, including suspension bridges strung with prayer flags. You’ll enter Sagarmartha National Park and then the climb starts to feel more serious—still scenic, but no longer “just warming up.”
Namche is also practical. It’s the biggest town on the Everest trail, so you’ll find the tools you’ll use for the days ahead: quality lodges, restaurants, shops, money exchange, and internet cafes. Even if you don’t plan to spend much time inside, this is where you can manage small issues fast—charging devices, buying snacks, or just soaking in the buzz of the Khumbu trail.
The Namche Acclimatization Day: Museum, Syangboche Views, and Oxygen Control
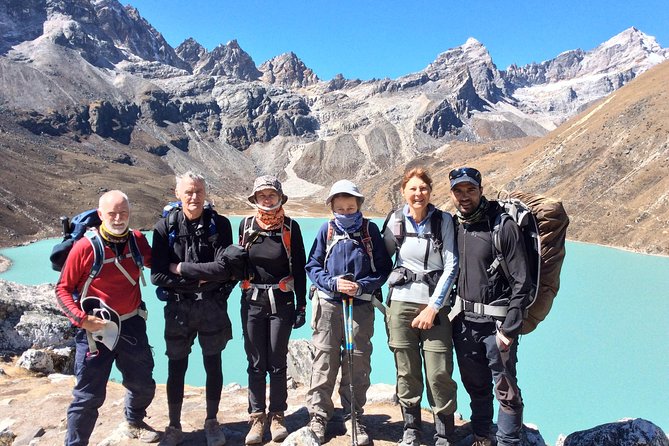
Day 5 is one of the most valuable parts of the whole plan, and it’s often where “successful treks” quietly win. You spend the day in Namche to acclimatize, and you don’t waste it with random busywork. You’ll trek a short distance to a museum focused on Sherpa customs, so you learn while you walk. Then you hike up near Syangboche Airport (near the Everest View Hotel) for rewarding panoramic views and especially for a sunrise/sunset-style perspective.
Why this day helps you: acclimatization is not only about altitude numbers; it’s also about adjusting your breathing and pace. The plan gives you time to settle, eat well, sleep, and move without pushing too hard before going higher toward Gokyo.
What I like here is the balance. You get a hike and views, but it’s not a “go big” day. In a trek like this, that restraint usually pays off later on Gokyo Ri.
Phortse and the Way Up: Rhododendron Forests and Khumbu Character
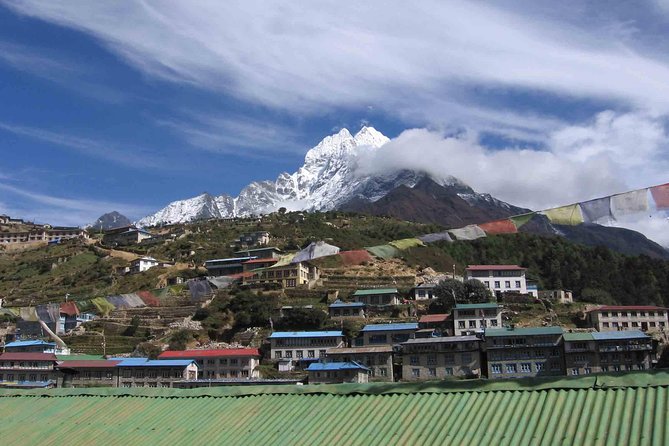
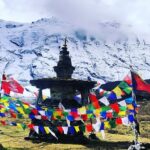
Day 6 takes you from the Namche area toward Phortse. The trail climbs through rhododendron forest, with juniper and larger conifers showing up as you gain elevation. You’re also moving through a more pristine, quieter feel compared with Namche’s town energy.
This section also threads through yak Kharkas and seasonal settlements. That matters because it’s not just walking between signposts; it’s moving through the places locals actually live and rely on—especially in summer.
Day 6 also includes big-picture views—Khumbi La and Tawache are named in the route description, and you’ll likely feel like you’re walking along the edge of the mountain wall even when the trail seems steady.
To Machhermo and Gokyo Approach: Glacier Territory Without the Chaos
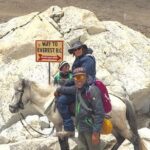
By Day 7 you’re heading toward Machhermo, and the description sets up why this part feels special: you climb a ridge for views down the valley toward Kengtega, then you look up toward Cho Oyu before descending and climbing again toward the terminal moraine of the Ngozumpa Glacier.
This is the transition into glacier country. You’re not only “going to see ice later”—you’re walking into the environment shaped by ice and melt patterns. Expect the terrain to reflect that: the trail and surroundings can feel more dramatic and colder as you near the moraine.
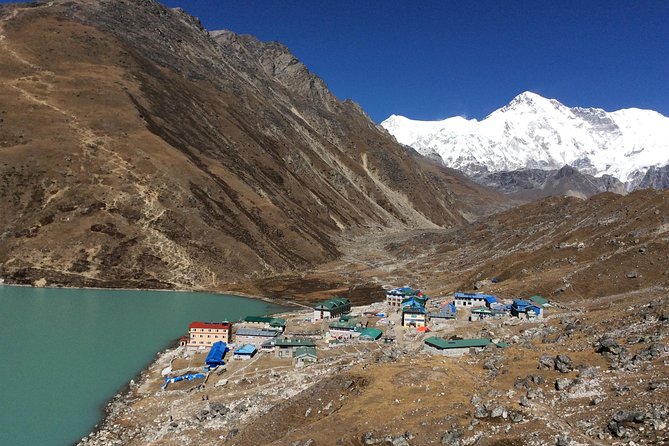
Then Day 8 brings the main destination: Gokyo (4,790m). You’ll camp there as a base for two nights. Two nights is a good number. It gives you time for sightseeing and short hikes without forcing you to pack up every day for the sake of a tight itinerary.
Gokyo Valley Basecamp: Lodges, Lakeside Views, and Glacial Scale
Day 8 is a key “arrive and settle” moment. You reach Gokyo at 4,790m and establish camp so you can explore the area. This is where the trek shifts from “getting there” to “taking it in.”
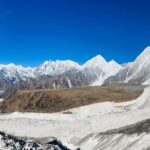
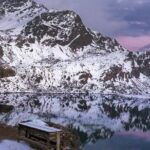
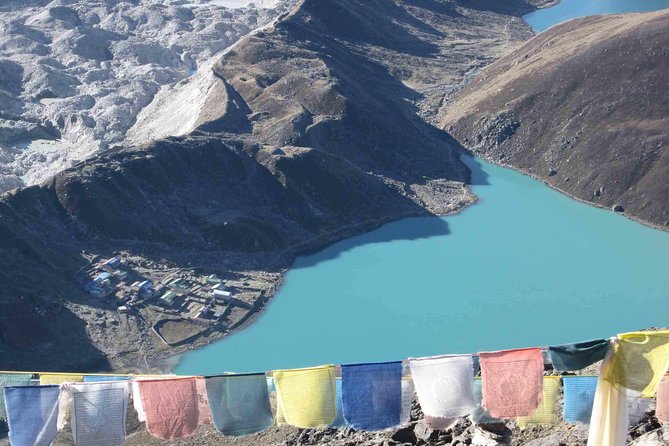
In the Gokyo Valley area you’ll be surrounded by big glacial scale, especially with references to the Ngozumpa Glacier and the ice ridge between peaks like Cho Oyu and Gyachung Kang. Even when you’re not on a viewpoint hike that morning, the glacier presence tends to show up in your line of sight.
Practical note: plan to spend time just breathing, eating, and letting your body adapt. At this altitude, your energy isn’t only about how hard the trail is—it’s about how steady your routine stays.
Gokyo Ri Sunrise: The 30-Minute Climb That Changes Everything
Day 9 is the payoff day: an early steep climb up to Gokyo Ri at 5,483m. The route description calls it 30 minutes, but that’s the kind of time estimate that assumes you’re moving well and not stopping often. Either way, the main point is clear: it’s a short but steep push.
Then you get rewarded with views of:
- The super Gokyo valley
- The massive Ngozumpa Glacier
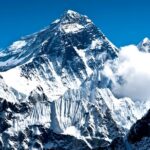
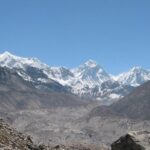
- A wide Khumbu panorama including Everest, Lhotse, Nuptse, Makalu, Cho-Oyu, and Gyachung Kang
This is the moment you understand why this trek is so popular. At Gokyo Ri, the mountains aren’t just “seen.” They’re arranged in a way that makes the whole Everest-region geography feel readable.
If you’re sensitive to altitude, this is also where your guide matters. A good guide keeps the pace controlled and watches everyone’s comfort level on the climb.
Descending to Dole, Then Sliding Back Toward Namche
After Gokyo Ri, Day 10 heads to Dole as you descend. This is where people often feel relief, but you still need to treat the day like hiking at altitude. Going down can still tax you, especially on knees and ankles if your stride gets sloppy.
Day 11 continues your descent and moves back toward Namche Bazaar, passing through Khumjung. Your route description points out leaving the mountains behind as you descend, but don’t be fooled—those last big passes and valley shifts still come with an altitude hangover.
Day 12 is a return to Lukla. By now, the trek feels like a long story with a beginning you can recognize. In Lukla you get time to enjoy and reflect as a group, plus some extra exploring.
Kathmandu Return and Your Spare Day for Resetting
Day 13 is your flight back to Kathmandu, with last-minute mountain glimpses possible as you leave Lukla. When you land, you’ll transfer to your hotel via airport representative.
Day 14 is a spare day. This is smart. After long days on foot, one full buffer reduces the risk of turning your vacation into a tired blur. You can extend into optional activities like:
- Chitwan jungle safari
- Rafting adventure
- Kathmandu valley shopping
- Scenic Everest flight
- Mountain biking
In the evening there’s also a farewell dinner in a traditional Nepalese restaurant with cultural performances. That’s a good place to swap trail stories, compare notes, and feel the sense of completion that comes from climbing high and coming home intact.
Price and Logistics: What $1,514.67 Really Buys You
At $1,514.67 per person for roughly 15 days, this trek isn’t a bargain—but it also isn’t “tour-only expensive” if you look at what’s included.
Here’s what you’re getting without having to re-buy everything separately:
- Kathmandu hotel stays (4 nights) plus guesthouse accommodation on the trek (10 nights)
- Airport transfers and guided sightseeing in Kathmandu (with entrance fees during the guided portion)
- A licensed English-speaking trekking guide
- Porter support (1 porter per two clients)
- Trek permits
- Kathmandu–Lukla–Kathmandu airfare
- Key overnight gear: down jacket and sleeping bag (to be returned)
- Group size capped at a maximum of 15 travelers
- Partial meals: breakfast on 14 days, dinner on 11 days, lunch on 10 days
You still pay for things that matter personally: travel insurance that covers emergency high-altitude rescue and evacuation is not included, and personal trekking equipment is not included. Tipping is also expected for trekking staff and drivers.
So is it good value? It tends to be, because the cost includes the big pieces people often underestimate for this region: flights to Lukla, guide + porter staffing, permits, and the essential cold-weather sleep system. If you’d otherwise have to arrange those items yourself, the price starts to look more like a “buy-in” for simplicity and safety.
Who This Trek Fits Best (and Who Should Rethink)
This trek is designed for people with moderate physical fitness. You should be comfortable hiking uphill and downhill for multiple days, with early starts and thin-air effects. The altitude also matters: Lukla starts at 2,804m, and you go up to Gokyo (4,790m) and Gokyo Ri (5,483m).
This is a great fit if you:
- Want glacier-and-Everest-range views without trying to do a technical summit
- Enjoy Sherpa village trekking and monasteries with mountain sightlines
- Appreciate a steady pace with an acclimatization day instead of racing ahead
You might rethink it if you:
- Know you need guaranteed stable weather or fixed flight schedules
- Don’t have travel insurance that covers high-altitude emergency evacuation
- Struggle with steep climbs (Gokyo Ri is short, steep, and altitude-heavy)
On the human side, your group size is capped at 15, and that usually keeps the experience from feeling chaotic. In real life, good guides and organized crews also make a huge difference when weather shifts the plan.
Booking: Should You Book the Gokyo Valley Trek?
I’d book this if your main goal is mountain views with strong planning behind the scenes. The combination of a two-night base in Gokyo, a real acclimatization day in Namche, and the Gokyo Ri viewpoint at 5,483m is a high hit-rate formula: you get dramatic payoff without needing to be an elite athlete.
I’d also book if you value smooth logistics. Having airport transfers, Kathmandu sightseeing support, guide leadership, porter coverage, and included cold-weather sleep gear removes a lot of stress before you ever step onto the trail.
One last check before you commit: make sure you can handle the reality of Lukla. If flights get delayed, you’ll need patience. The trek is built for people who can flex a bit, follow instructions, and focus on the hike rather than forcing the schedule.
FAQ
How long is the Gokyo Valley Trek?
It’s listed as 15 days approximately, including time in Kathmandu and the trekking portion from Lukla to the Gokyo area and back.
Where does the trip start and end?
It starts at Tribhuvan Airport in Kathmandu and ends back at the meeting point (also at Tribhuvan Airport).
Is pickup offered in Kathmandu?
Yes, airport transfers are included, and pickup is offered.
What’s the maximum group size?
The tour has a maximum of 15 travelers.
Do I need a guide and porters?
You’ll have a licensed English-speaking trekking guide, and porter support is provided at a ratio of 1 porter for every two clients.
Is trekking gear included?
Yes. A down jacket and a sleeping bag are provided for the trek (and are returned after).
What altitude highlights are on the route?
Lukla is 2,804m, Gokyo is 4,790m, and the standout viewpoint hike is Gokyo Ri at 5,483m.