REVIEW · KATHMANDU
Everest Base Camp Trek Via Salleri
Book on Viator →Operated by icicles adventure treks and tours · Bookable on Viator
This route trades crowds for valley life. The Everest Base Camp trek via Salleri is a smart alternative to the more direct Lukla-style approach, routing you through quieter settlements, river-valley villages, and smaller trails before you join the classic Everest Base Camp feel.
Two things I really like: first, the way this trek leans into local life, with isolated Sherpa communities and a stop at Takshindo Gompa, plus time walking narrow canyons and crossing fast white rivers. Second, the logistics look designed to reduce stress at altitude, with an experienced guide plus porters (1 porter for every 2 hikers), and a plan that includes acclimatization hikes rather than just pushing upward.
One drawback to consider up front: while the trip includes your trekking support and lots of gear, meals for you are not included, so you’ll be budgeting day-by-day for tea house food at high elevations.
In This Review
- Key highlights worth your attention
- Why the Everest Base Camp via Salleri trek feels different
- From Kathmandu at 6:15 to Takshindo’s gompa day
- The next stretch: Khari Khola and Puiyan
- Namche Bazaar and Tengboche: acclimatization that actually has purpose
- Dingboche, Lobuche, and the build-up to Everest Base Camp
- Gorekshep to Kala Pathar (5545m): your big viewpoint payoff
- The return through Phakding and Puiyan, then the drive back home
- Price and value: what $1,952 covers (and what you still pay for)
- Guides, porters, and the logistics that keep the trek smooth
- What to pack and how to use the included gear well
- Should you book the Everest Base Camp trek via Salleri?
- FAQ
- Where does the trek start and end?
- What time does the experience begin?
- How long is the Everest Base Camp trek via Salleri?
- What permits are included?
- Is the tour private?
- Are meals included in the price?
- What gear is provided for the trek?
- What’s included for transportation?
- How are guides and porters arranged?
- What if weather cancels the trek?
Key highlights worth your attention
- Salleri route focus: fewer mainstream vibes and more remote villages along river valleys
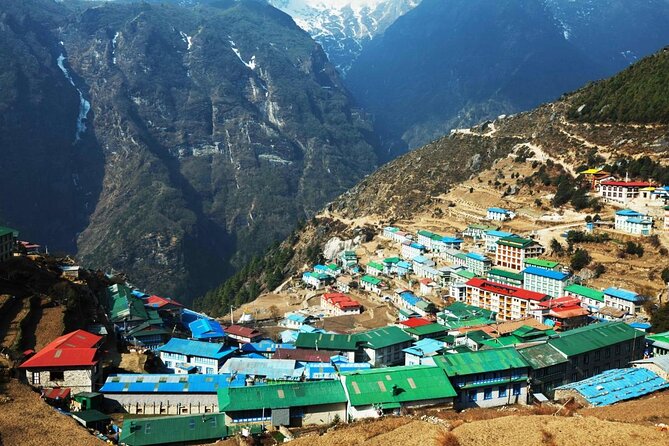
- Takshindo Gompa stop: a cultural anchor early in the trek
- Planned acclimatization: Everest View Hotel and Nagerjun hikes help your body adjust
- Big viewpoint sequence: Everest Base Camp (5364m) plus Kala Pathar (5545m)
- Staffing that matters: one highly experienced guide and porters (1 porter for 2 hikers)
- Gear support: down jacket and sleeping bag are included for the cold nights
Why the Everest Base Camp via Salleri trek feels different
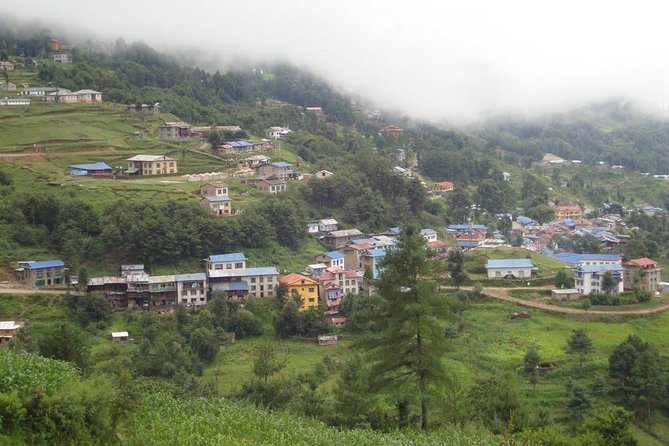
Most Everest Base Camp treks follow the same predictable pattern, and if you’ve been craving something more human-scale, this Salleri route makes sense. You spend more time in far-off settlements and smaller paths tied to the rivers and valleys rather than only the “main corridor” vibe.
The standout for me is the cultural rhythm. You’re not just walking from tea house to tea house. You pass through the kind of places where Sherpa families live close to the geography: crevasses, slopes, narrow valleys, and the daily work around pastures and terrace farms. That shows up in the pacing. Instead of feeling like you’re in a line, the trek feels like you’re moving through a real region.
The second big plus is the variety in scenery and walking styles. Your route includes narrow canyon walking and gushing white river crossings, which changes your mental load. Instead of only “up, up, up,” you also get moments where your attention goes to footing, crossings, and weather changes—real trekking, not just altitude bookkeeping.
One note: the trek is listed for travelers with moderate physical fitness, so it’s not for couch-to-5,000m magic. It is still a real high-altitude trek, with several steep days and big elevation swings.
You can also read our reviews of more tours and experiences in Kathmandu.
From Kathmandu at 6:15 to Takshindo’s gompa day
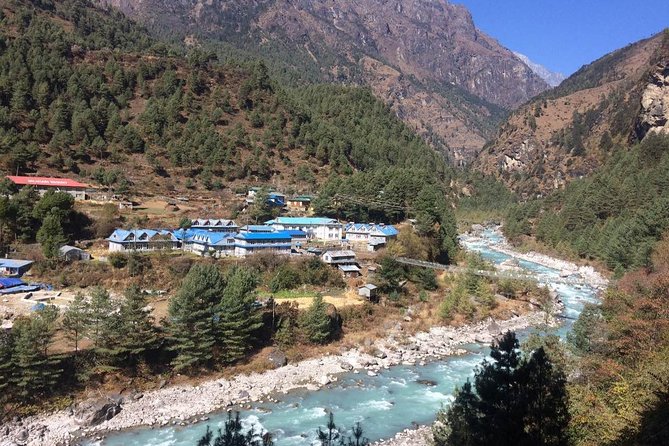
Your trip starts in Thamel, Kathmandu, with a 6:15am start and the promise of local transport and airport transfer. Day 1 is just arrival at Tribhuvan International Airport, then Day 2 kicks into motion: you drive from Kathmandu toward Phaplu and Ringmo, then hike for about 30 minutes to Takshindo (3071m / 10072ft).
That early Takshindo day is more than a warm-up. It sets the tone for why Salleri is different. This trek doesn’t begin with the most crowded “Everest traffic.” It starts with valley travel and a first taste of the slower, community-connected approach.
Takshindo is also where the trek’s “culture + trail” theme becomes concrete. The route highlights Takshindo Gompa, and gompas matter here because they’re living spiritual hubs, not just photo stops. You’ll likely get a calmer, more grounded feel while you move through the village edges and the trail systems that local families use.
The next stretch: Khari Khola and Puiyan
Day 3 goes Takshindo to Khari Khola (2194m / 7196ft), which is a helpful pattern: you start higher, then you drop a bit. That can make the first week feel more manageable while you find your rhythm.
Day 4 brings Khari Khola to Puiyan (2890m / 9479ft). This is a good example of how the Salleri approach balances movement with gradual adjustment. You’re not only gaining altitude; you’re learning the rhythm of steep climbs, breaks, and changes in trail conditions.
If you’re the type who likes hiking with a plan but also wants room for scenery and small moments, this first block is where you’ll feel it.
Namche Bazaar and Tengboche: acclimatization that actually has purpose
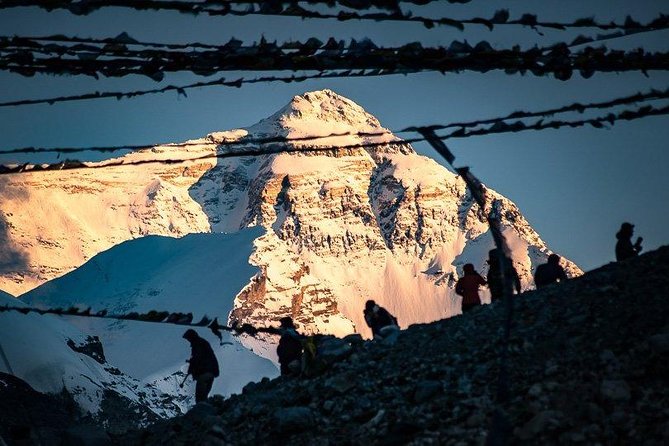
You reach Phakding (2652m / 8699ft) on Day 5, then Day 6 is Phakding to Namche Bazaar (3440m / 11283ft). Namche is where most Everest-area trekkers start to feel the altitude shift, so what you do there matters.
Day 7 is a true acclimatization day: you hike to Everest View Hotel and return. The goal with these days is simple: help your body adjust while you keep pushing movement forward. You’re learning your limits before you stack more altitude the following days.
I like that the itinerary doesn’t treat acclimatization as optional. It’s built in twice later too (more on that soon). That matters for comfort and for safety, especially if you’re not a fast hiker.
Then Day 8 takes you Namche to Tengboche (3860m / 12660ft). Tengboche is a big shift in both altitude and feel. You’re moving into a zone where the Everest story becomes more visible, and where the trail often brings you close to religious sites and viewpoints that help you understand why people make the trek year after year.
A practical consideration here: lodge quality is usually decent in these core stops, so expect it to feel warmer and more established than the earlier valley villages. The balance is good: you get quieter trail early, then you get the “settlement comfort” you’ll want before the highest days.
Dingboche, Lobuche, and the build-up to Everest Base Camp
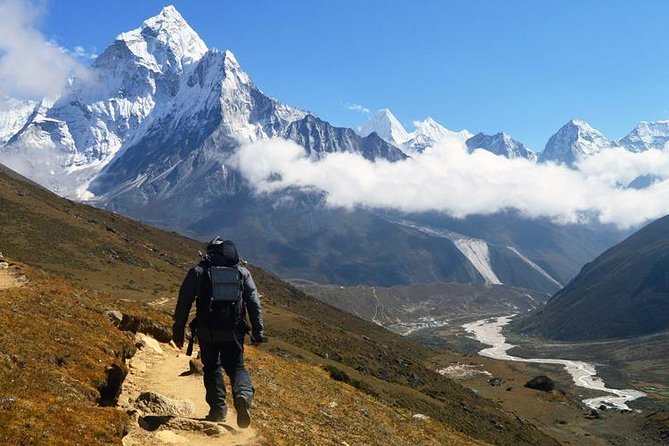
After Tengboche, you continue toward Dingboche (4410m / 14464ft), then you get another scheduled acclimatization day. Day 10 is an acclimatization hike to Nagerjun and back. Like the Everest View Hotel day, this is about letting your body process altitude without turning the whole trek into one long grind.
Day 11 goes Dingboche to Lobuche (4910m / 16105ft). This is one of those “getting serious” days. The air is thinner, and the landscape around you tends to feel harsher—so pace and hydration become more important than pushing speed.
Day 12 is the summit day goal in altitude terms: Lobuche to Everest Base Camp (5364m / 17594ft) – Gorekshep. You’re spending time at the key staging area near Base Camp, and even if the weather changes your plans, reaching this zone is the whole reason many people pick Everest.
Here’s how I’d think about it: the Base Camp push isn’t only about checking a box. It’s also when your “trek story” becomes real. All the earlier days of Sherpa villages, gompas, river crossings, and acclimatization hikes build into this moment.
Gorekshep to Kala Pathar (5545m): your big viewpoint payoff
Day 13 is Gorakshep – Kala Pathar (5545m / 18188ft) – Pheriche (4210m / 13809ft). Kala Pathar is the kind of viewpoint that makes your legs feel worth it. It’s also high enough that cold, low oxygen, and wind can be real factors.
Since the exact start time isn’t stated, I’ll keep this practical and non-speculative: plan for very early or very cold conditions if the day is set up for views. Bring the warm layers you need, and don’t use altitude as an excuse to ignore basic pacing. Slow is good here.
Then Day 14 is Pheriche to Namche (3440m / 11283ft). This “downward reset” is important. It’s also where a lot of people feel relief, because the next days are long but less punishing than the highest climb days.
The return through Phakding and Puiyan, then the drive back home
From Namche, the trek repeats the movement through key stops but in reverse. Day 15 is Namche to Phakding (3440m / 11283ft), Day 16 is Phakding to Puiyan (8699ft / 2652m), and Day 17 is Puiyan to Khari Khola (9479ft / 2890m).
This back half can feel mentally easier because you know the trail. Still, high altitude fatigue doesn’t care about nostalgia. You’ll want your rhythm and your pack weight under control.
Day 18 finishes the trek’s valley loop: Khari Khola to Takshindo (7196ft / 2194m). That’s a satisfying end point because it ties back into the start area and the early-culture tone of the trip.
Day 19 is your transition day: a long drive from Takshindo – Ringmo – Phalpu to Kathmandu, about 8 hours, plus a 30-minute walk. Day 20 is a farewell, back to the meeting point in Thamel.
If you’re a planner, this structure is helpful. You’re not stuck hiking every day with no “reset” until the end. You’ll get a clear rhythm of walking days, viewpoint days, and then the return travel day.
Price and value: what $1,952 covers (and what you still pay for)
At $1,952, this is not a cheap trek. But for Everest, the value comes from what’s included and what it removes from your responsibility.
What’s included:
- All fees and taxes, plus Sagarmatha National Park permits and TIMS
- Guide and porters (1 porter for 2 hikers), including pay, insurance, and related equipment needs
- Ground transport in local jeep, including airport transfer
- Best available lodges
- Trek gear: duffle bag, down jacket, and sleeping bag
- Trek map and trip certificate
- Attached bathrooms with hot shower are listed for Lukla, Phakding, and Namche (plan on hot showers where available)
What’s not included:
- Meals (this is the big day-to-day variable)
- Travel insurance and international airfare
- Personal expenses like laundry or beverages
- Tips and gratuities for trekking staff
Here’s the honest value math: you’re paying for altitude support—permits, staff, and gear—so you’re not scrambling for basics at high elevation. The one thing you’ll need to budget for is food at lodges, where prices typically rise with height. If you like predictable budgeting, plan your meal costs before you go.
Also, note what gear support means. With a down jacket and sleeping bag included, you don’t have to rely on your own winter gear quality. That can save both money and stress, especially if you’re traveling from elsewhere.
Guides, porters, and the logistics that keep the trek smooth
The best trekking trips are the ones where logistics don’t become drama. This one is designed for that with a private group setup and a strong staff presence.
The guide is listed as highly experienced and friendly, and your porter support is structured at 1 porter for 2 hikers. That means you should feel less punished by your pack weight on the steeper segments.
In the reviews, staff members get praised for organization and care. I saw repeated themes: guides keeping an eye on needs, and the team stepping in fast when plans change. One review described jeeps being quickly arranged when a flight wasn’t possible, after a clear explanation and schedule update. That’s the kind of contingency planning you want on a trek where weather can shift transport.
You might also meet guides like Pooja (lead guide) and Prem (assistant guide) on some departures, and you could encounter other staff named Prakash, Manoj, Neel, Ram, Lal, or Indira. The common thread is the same: they’re proactive, they communicate, and they help you stay confident around people and schedules.
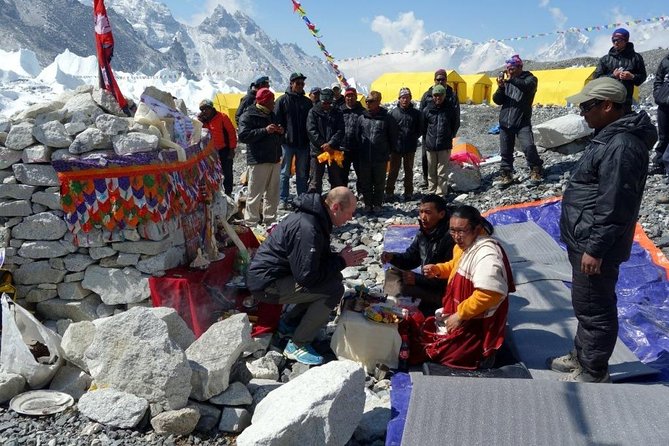
There’s also a softer side shown in a review about handling a personal request involving ashes at Everest Base Camp. Another review talked about staff going above and beyond after an accident near the end of the trip. I can’t guarantee outcomes, but these notes suggest the team treats your wellbeing as part of the job, not just a checklist.
What to pack and how to use the included gear well
Your trek gear is partly handled. The operator provides a down jacket and sleeping bag, plus a duffle bag. That’s a big relief because it covers the cold-night essentials.
Still, you should bring your personal items smartly:
- Warm layers for day and night, even with the provided jacket (wind and temperature can swing fast)
- Gloves, hat, and a neck layer if you run cold
- A small daypack for water, snacks, and layers
- Passport-size photos for permits (TIMS is mentioned, and it says to bring two passport size photos)
Also think about what you will carry while your porter handles the heavy load. If you like control, keep your essentials in your daypack so you’re not waiting on someone else for small things like water, sunscreen, or extra warmth.
One more practical note: since meals are not included, decide early how you’ll handle snacks and tea house meals. If you like eating steadily at regular times, budget for that. If you prefer simple meals and light snacking, you still need enough fuel to handle high altitude effort.
Should you book the Everest Base Camp trek via Salleri?
I’d book this trek if you want Everest Base Camp, but you also care about getting there through a more human route. The Salleri approach makes sense if you’re tired of the most crowded flow, and you want more time around Sherpa villages, river valleys, and Takshindo Gompa rather than only the busiest corridors.
I’d think twice if you:
- hate the idea of buying your own meals during the trek
- aren’t comfortable with moderate physical fitness requirements in high-altitude conditions
- want a trip with no surprises on transport (weather can always affect things, even with contingency plans)
If you’re flexible, value a good guide and porter setup, and want an Everest story that includes the quieter sides of the region, this is a strong pick.
FAQ
Where does the trek start and end?
It starts in Thamel, Kathmandu (44600, Nepal) and ends back at the same meeting point in Thamel.
What time does the experience begin?
The start time is listed as 6:15 am.
How long is the Everest Base Camp trek via Salleri?
The duration is about 20 days.
What permits are included?
The trek includes Sagarmatha National Park permits and a TIMS fee. You should bring two passport-size photos for the permit.
Is the tour private?
Yes. It’s described as a private tour/activity, with only your group participating.
Are meals included in the price?
No. Meals are not included, though food for guides and porters is covered.
What gear is provided for the trek?
You receive a duffle bag, and the trek provides a down jacket and a sleeping bag during the trek.
What’s included for transportation?
All ground transports in local jeeps are included, including the airport transfer.
How are guides and porters arranged?
The trip includes one highly experienced guide and porters with a ratio of 1 porter for 2 hikers.
What if weather cancels the trek?
The experience requires good weather. If it’s canceled due to poor weather, you’ll be offered a different date or a full refund (cancel up to 24 hours in advance for a full refund).