REVIEW · KATHMANDU
Everest Base Camp Budget Trekking
Book on Viator →Operated by Global Holidays Adventure P. Ltd · Bookable on Viator
Everest Base Camp on a budget is a real thing. This trip threads through the Khumbu’s famous towns and pushes you higher, step by step, with built-in time to adjust to altitude. You’ll also get the practical pieces that matter—an English-speaking guide, permits, and a private setup—so the focus stays on walking and views.
I like the pacing here: acclimatization stops in Namche and Dingboche help reduce altitude trouble, and the itinerary doesn’t just rush you uphill. I also like that the experience includes the core logistics like flights to Lukla and back, plus the staff team (guide and necessary porters). The one drawback to plan around is budget reality: meals, beverages, and water during the trek aren’t included, and hot showers aren’t part of the deal either.
In This Review
- Key takeaways before you go
- What you get for $900: value without the fluff
- Kathmandu arrival: a smooth start in a busy city
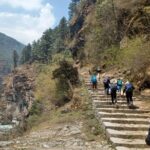
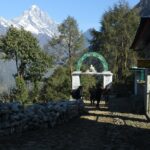
- Lukla to Phakding: first views, first altitude lessons
- Namche Bazaar and acclimatization: the smartest part of the route
- Tengboche to Dingboche: monasteries, prayer flags, and higher air
- Lobuche and the road to Base Camp: when the altitude tightens
- Kalapattar morning: the view, the work, and the descent to Pheriche
- The return: back to Namche and Lukla
- Food, water, and the real budget math
- Luggage limits, sleeping baggage, and cold-night comfort
- Permits, TIMS card, and why paperwork matters
- Private tour with guide support: what that means day to day
- Who should choose this trek (and who should rethink it)
- Should you book this Everest Base Camp Budget Trekking?
- FAQ
- How long is the Everest Base Camp trekking trip?
- What flights are included in the package?
- Do I get a guide and porters?
- Are permits included for the Everest region?
- Are meals and water included during the trek?
- Is hot shower included?
Key takeaways before you go
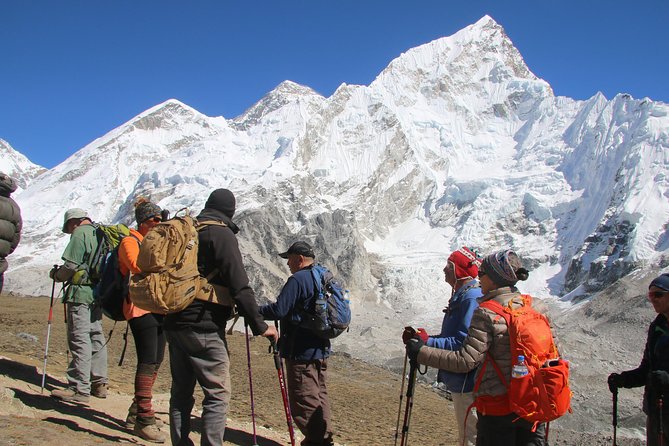
- Private trekking, just your group means fewer waits and more control over your day
- Acclimatization days are built in, not tacked on as an afterthought
- Lukla flights have a 15 kg luggage limit, so pack light and smart
- Everest-area permits and TIMS card fees are included, saving you paperwork stress
- Food and drinks on the trail cost extra, so budget accordingly
- Kalapattar is the payoff, the hike that often turns a good trek into a memorable one
What you get for $900: value without the fluff
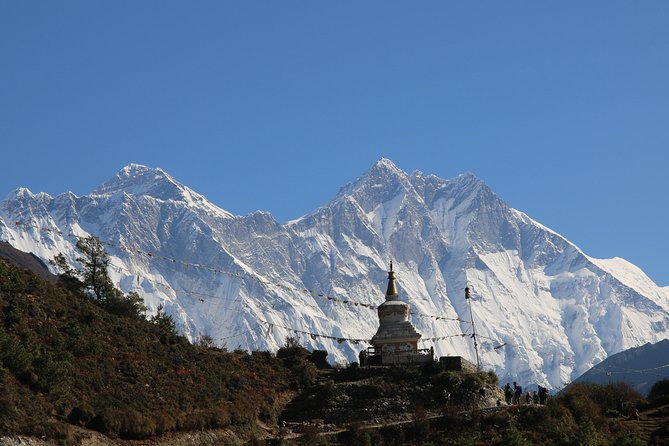
At $900 per person, this Everest Base Camp trek is clearly aimed at keeping costs down while still delivering the real essentials: getting you into the Khumbu, walking the classic route, and handling the main paperwork and local logistics.
Here’s where the value shows up:
- You’re covered on the big ticket logistics: Kathmandu to Lukla and back flights, plus airport transfers in Kathmandu.
- Permits and local fees are included, including the Everest National Park permit and TIMS card. Those aren’t optional add-ons here.
- A professional English-speaking guide is included, along with “necessary potters” (porters). That matters more than people expect. When you’re tired and the weather shifts, having trained support helps.
Now the part you should be honest about: you’re not buying a “full board” package. Food and beverages during the trek are not included, and the itinerary also lists no hot shower. So the real cost of the trip won’t end at $900—you’ll still pay for meals and drinks along the trail. The good news is you can control that spending by how frugal (or not) you want to be.
You can also read our reviews of more tours and experiences in Kathmandu.
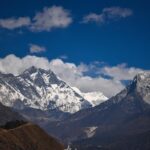
Kathmandu arrival: a smooth start in a busy city
Day 1 is straightforward: pickup from the international airport in Kathmandu and transfer to a hotel. For a trek like this, I like the calm start. Kathmandu can be chaotic—traffic, noise, and the mental overload of altitude planning. A proper arrival transfer helps you avoid one more stressful task.
Then Day 2 is your gear-to-trail pivot. You’ll fly to Lukla and hike to Phakding (about 2,652 m)—a short walking day by Everest standards. That’s a smart way to get your legs working without detonating your energy before altitude becomes the real issue.
If you’re the kind of person who gets anxious about trip details, one review-style theme that comes through strongly is trust in the planning. People highlight working with a point person named Surya at Global Holiday Adventures for support with arranging the trip. That’s worth something when you’re coming from abroad and want the process to feel managed.
Lukla to Phakding: first views, first altitude lessons
The Lukla to Phakding day is about momentum. You start with a flight, then you walk into the Khumbu rhythm. Expect trail time in the 3–4 hour range, which is short enough to keep you from overdoing it.
Phakding itself is a useful first base. It’s high enough to remind you you’re in the mountains, but it’s not yet where altitude starts dominating your choices. This is when you should:
- Test your footwear and trekking poles (if you use them).
- Practice slow pacing. If you rush early, you’ll pay later.
- Pay attention to how you breathe on small climbs. Everest-area altitude isn’t subtle.
Namche Bazaar and acclimatization: the smartest part of the route
Day 3 brings you to Namche Bazaar (about 3,440 m) after a 5–6 hour hike. This is a classic turning point. Namche isn’t just a stop—it’s a place where the trek becomes real: you’ll see trekkers from different routes, you’ll feel the altitude more, and you’ll be surrounded by that Khumbu “people moving toward Everest” energy.
Day 4 is an acclimatization day in Namche. Day 7 adds a second one later (more on that soon). These rest days are the difference between a trek that feels tough-but-manageable and one that turns into a medical problem.
Why this matters:
- Acute mountain sickness (AMS) is a serious risk in this region.
- The trip explicitly emphasizes ascending slowly and taking the recommended rest day.
- You can feel fine on Day 3 and still struggle later if you don’t respect altitude.
You’ll also learn (fast) that “rest day” doesn’t mean do nothing. It usually means move gently, get your bearings, and let your body adjust.
Tengboche to Dingboche: monasteries, prayer flags, and higher air
Day 5 takes you to Tengboche (about 3,860 m), again around 5–6 hours. Tengboche is known in the Everest region for religious sites and that iconic village-trail atmosphere. Practically, it’s also a good checkpoint town. It lets you refill your energy and settle into the higher-elevation pace.
Then Day 6 moves you to Dingboche (about 4,410 m). This is where fatigue starts to creep in more noticeably. Another 5–6 hour day means you’re still working, but you’re already transitioning into thinner air.
Day 7 is your second acclimatization day. If you take one thing from this itinerary seriously, take this: your plan includes the rest you need. That’s a strong point for a budget trek, because cheap tours sometimes skimp on acclimatization. This one doesn’t.
Dingboche is also the place where you learn how your body reacts when you climb even a little. If you’re the type who pushes through discomfort, this is where you’ll need discipline.
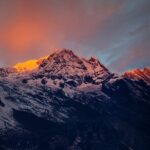
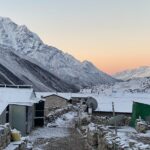
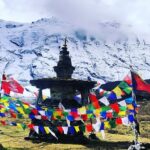
Lobuche and the road to Base Camp: when the altitude tightens
Day 8 takes you to Lobuche (about 4,910 m) in 5–6 hours. The names change, the elevations climb, and the walking becomes more about consistency than speed. This is a big stretch of the route where there’s less room for mistakes.
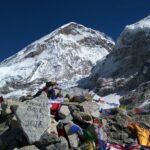
Day 9 is the day you reach Everest Base Camp (about 5,160 m) and then continue to Gorak Shep (also referred to as Gorekshep in the outline). Day 9 is usually physically demanding because it mixes the emotional high of reaching Base Camp with the reality of still being at altitude.
Expect 5–6 hours total walking on Day 9, then a return to sleeping at the higher point. That matters because it sets up Day 10—the Kalapattar climb—and Kalapattar is where many trekkers get the clearest, most dramatic views of Everest.
Practical note: because the itinerary doesn’t include helicopter support or emergency rescue fees, you’re relying on normal mountain logistics. That’s fine if you pace correctly and don’t ignore early symptoms. But you should take altitude seriously and treat “I feel off” as information, not a debate.
Kalapattar morning: the view, the work, and the descent to Pheriche
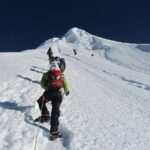
Day 10 starts with hiking to Kalapattar (about 5,545 m) and then trekking down to Pheriche (about 4,210 m) in 6–7 hours. This is one of the most memorable days because Kalapattar is a big payoff zone.
But it’s also a day where your body tells you the truth about altitude. If you’ve respected the acclimatization earlier, you’re more likely to enjoy this day instead of white-knuckling through it.
Pheriche is a descent for your legs and a mental reset. It’s also part of the itinerary’s plan to bring you back toward Namche.
The return: back to Namche and Lukla
Day 11 goes back to Namche in 6–7 hours. Day 12 brings you to Lukla in 6–7 hours, and then Day 13 returns by flight to Kathmandu (around 1,337 m).
These back days matter. You’ll feel elevation fatigue, not just sore knees. The route plan gives you time to walk steadily rather than forcing speed. Still, you’ll want to stay mindful about hydration and pacing because fatigue can make you sloppy on rocky trail.
There’s also a different emotional texture on the way down. You’ve reached your goal. Now it’s about enjoying the mountains you earned and noticing details you might have missed on the way up.
Food, water, and the real budget math
One of the clearest “don’t get surprised” points here is that all food during the trekking is not included, and the same goes for beverages. The itinerary lists that beverages, alcoholic drinks, mineral water, and boiled water during the trekking aren’t included.
That doesn’t mean you’ll starve. It means you should budget for the daily reality of trekking in Nepal: tea, soups, simple meals, and bottled or treated water options. If you’re trying to keep the trek truly budget-friendly, plan to choose straightforward foods and limit expensive drinks.
Also, hot shower isn’t included. Cold washcloths become your friend. That’s normal here, and if you pack with comfort in mind, you’ll handle it better.
Luggage limits, sleeping baggage, and cold-night comfort
The Lukla flights have a strict 15 kg luggage limit per person. That’s not a small detail. It decides what you can bring, and the result is usually either: you pack smart, or you end up dealing with too much weight and not enough room.
On sleep: the package includes good quality sleeping baggage during the trekking, and the outline says it’s refundable after you finish trekking. That’s useful because cold nights can wear you down fast, and not every traveler wants to rent or buy everything separately.
You’ll also have a first aid kit included. It doesn’t replace medical care, but it’s a practical baseline.
Permits, TIMS card, and why paperwork matters
For Everest-area trekking, permits aren’t optional. This package includes:
- Everest National Park permit
- Local community fees
- TIMS (Trekking Information management system) card fees
Those are the bits that keep your trek legal and organized in the region. For peace of mind, it’s a big plus that you’re not scrambling at the last minute for document steps.
It also helps that the itinerary builds in staff logistics: the package includes insurance, equipment, and medicine for staff, plus transportation and salaries for the team. Again, this is the difference between a smooth trek and a half-managed one.
Private tour with guide support: what that means day to day
This is listed as a private tour/activity, and that matters. You’re not stuck with random pacing from a mixed group. Your guide can adjust speed, stops, and how often you rest, which becomes important once altitude starts tightening your breathing.
You’ll have one professional English-speaking trekking guide and necessary porters. Porters change the day. They take the load so you can keep consistent effort instead of wasting energy hauling weight that slows you down.
And one more detail from the tour experience feedback: some people prefer adjusting the plan to their own pace, including solo trekkers who chose a Sherpa support setup so they could walk at their own rhythm. Even if you’re not going solo, the underlying idea is the same: you’ll do best if you treat this as a walking trek first, not a speed challenge.
Who should choose this trek (and who should rethink it)
This Everest Base Camp budget trek is positioned for people who are moderately fit. It also states you don’t need previous adventure experience. That’s helpful if you want a serious mountain trek without technical climbing skills.
That said, altitude still demands respect. If you have pre-existing medical flaws, the trip advises you to seek medical advice before considering it. The region’s risk is called out clearly: AMS is a serious risk, and the itinerary emphasizes ascending slowly and taking rest days.
So I’d recommend this to you if:
- You want an Everest trek with a real support team
- You can handle multi-day trekking and don’t mind basic amenities
- You’re okay paying extra for meals and drinks on the trail
I’d be cautious if:
- You’re looking for a luxury comfort setup (no hot shower, and trekking food isn’t included)
- You hate flight uncertainty (Lukla weather can delay schedules, and helicopter fees are not included)
Should you book this Everest Base Camp Budget Trekking?
Book it if you want a solid, budget-minded Everest trip where the heavy logistics are handled and the itinerary respects acclimatization. The included guide and porters, the permit coverage, and the built-in rest days are the big reasons this can feel manageable.
Skip it or shop carefully if your budget can’t handle the extra trail costs for food and beverages, or if you expected hot shower comfort. Also take a close look at your own health situation, because altitude risk is not a scare tactic—it’s a real factor in this region.
FAQ
How long is the Everest Base Camp trekking trip?
The duration is listed as 14 days (approx.).
What flights are included in the package?
You get flight fare for Kathmandu–Lukla–Kathmandu. Airport pickup and transfers in Kathmandu are also part of the itinerary.
Do I get a guide and porters?
Yes. The trip includes one professional English-speaking trekking guide and necessary potters.
Are permits included for the Everest region?
Yes. Everest National Park permit, local community fees, and the TIMS card fees are included.
Are meals and water included during the trek?
No. Lunch, dinner, and other expenses in Kathmandu are not included, and all foods during the trekking are listed as not included. Beverages and mineral/boiled water during the trek are also not included.
Is hot shower included?
No. Hot shower during the trekking is listed as not included.